Sunday, March 29, 2015

Project Update: The Saga of the Assembly Table (Cont'd)

I've picked up a nasty virus that started as a stuffy-head cold and has moved into my chest. It's just horrible. I suppose it's my body's way of telling me to slow the hell down, but I'm not one to listen to such drivel. Then again, I really don't want pneumonia, so I took a few days off to get better. This has seriously stunted my progress in the shop and I'm now stressed about completing the electric cello in time (April 9th for my son's birthday). So, ignoring my body's incoherent mumblings, I went ahead and mounted the plywood to the table top and threw it up on the legs that were pointing awkwardly toward the ceiling. Much coughing ensued.


Everything fit nicely. The next immediate step is to fasten it to the legs with lag bolts on the sides, 3" wood screws on the top. I will also be adding lag bolts to the bottom - I'm not sure why I didn't use them in the first place. I guess I'm not equipped to think of everything without using a prepared plan. Once I've fastened everything up, I'll be adding 2x4 cross beams to the legs and the hardened board to the top. The torsion box setup will have to wait - I need to get back to work.

On an unrelated note, I was able to replace my little portable toolbox with a larger, more permanent one. The new toolbox was only $50 - how could I pass that up, right? I paid almost twice that for the old one from a "friend" back in the day when I didn't know any better. Thanks, buddy.

Buddy Special

New Box

I still need to clean the new one up a bit and decide what I'm going to do with the old one. In the interest of keeping the shop clear of refuse and unneeded tools and equipment, I suspect a listing for it will go up on Craigslist next week.

Until next time...

Wednesday, March 25, 2015

Project Update: Assembly Table Bottom Finished

I was able to get the bottom of the assembly table completed last night with no help. This was not a good idea. The plywood and hardened board were extremely unwieldy and I've decided to wait until I have some help to complete the top. This is holding everything, including the electric cello project up,  but it must be done.


First was the 3/4" plywood intended to provide a bottom shelf and also stability - it's tacked to a 1" lip around the bottom frame.  Then came the 1/8" hardened board.


Did I need the hardened board? Probably not, but it will keep the plywood from wearing and a 4' x 8' sheet is only $9 at Home Depot. If it gets trashed, I can simply replace it with another. I'll use this same configuration for the top and include some additional reinforcement by essentially turning it into a torsion box. I'll be adding 2x4 cross beams to all of the legs once I get the top installed and may even throw some shelves and dividers in at some point. For now, I just want to GET IT DONE!

Until next time...

Tuesday, March 24, 2015

Project Update: More Table Progress

Yes, I'm still working on the assembly table. As you may or may not know, I'm a pretty solitary guy, at least when it comes to work. Sure, I can yuck it up with the best of them in a social setting, but when it comes to getting stuff done, I prefer to work by myself, for myself. Now, having said that, I can say with complete confidence that it sure would be nice to have some help with this table. Just a little help, not necessarily guidance or screwing and gluing. Someone to hold things straight while I attach parts would be an enormous help. In fact, I have no idea how I'm going to get the bottom and top of the table on given space and lifting constraints, but I'll git 'er dun.


As you can see, I've relied heavily on clamping to assist the assembly process. Who doesn't, right? And I've discovered through this mini-project that my chop saw does not make perfectly straight cuts. Oy. I'll either work to get it calibrated properly or it will have to go. In the case of this table, it's not such a big deal. In the case of the instrument case, it will be, so I'll be looking at that in depth over the next few days. In the meantime, on to finishing this monster.


I'm using the new table saw as a cut/assembly table. This is not my preferred use of the saw, but what am I gonna do? I need to get this done so I can move on to building the case. In the photo immediately above, I've lined out all of the cuts for the sides (the table is 4' x 8' including the 2x4s that line the sides, so the plywood and hardened boards are 93" x 45") and the notches for the legs. This will be the bottom shelf of the table. My intent with the shelf is to get the specialty and exotic woods lining the walls onto it to free up some space around the shop. I'll be lining it, like the top, with a 1/8" layer of hardened board that I can easily replace should it get marred and scarred.

I'm hoping to have this thing completed by this coming Monday. Wish me luck.

Until next time...


Monday, March 23, 2015

Project Update: Assembly Table Progress

I don't have much to report, I just wanted to give an update regarding the assembly table. The table is 4' x 8' and I'm putting it together myself, so my progress is not as fast as if I had a helper or two. I was hoping the shop elves would show up during the night and complete it, but, alas, that has not been the case.  As you can see, I've completed the frames for the top and bottom and am installing the legs now. The intent of this table is to create a sturdy structure with room for wood storage and to act as a table saw outfeed table.


As I was screwing the frame to the leg on the left in the photo above, I broke two Phillips screwdriver drill inserts; they just crumbled. These are generally built to withstand a lot of pressure, but I think the fact that I turned the drill speed down a notch and the screws are three inches long while my drill bit is barely two contributed to the breakage. I use a quick-release adapter for both, so I'll have to adjust to another adapter I have or break down and buy a new Phillips screwdriver insert or six. Either way, thank goodness for quick-release gadgets - they're awesome.

Until next time...

Friday, March 20, 2015

Project Update: An Assembly Table and a New Name

One of the things I've been lacking in the shop is a big, sturdy assembly table. This will be increasingly necessary as I begin the casework for the instrument and it will be nice to have for everything else I work on from time to time. I've been working on a 2' x 5' workbench I purchased at Home Depot five years ago. While it's been nice to have, it's just too small for a lot of the work I now do.

When I initially considered building an assembly table, I thought I might put one together that breaks down easily, but then I would struggle with it not being as stable as I will need, especially for gluing large parts. In the end, I decided to build a 4' x 8' multi-function table that will act as the main fixture in the middle of the shop, as well as a place to store the exotic, specialty and smaller woods that line the shop walls.

The assembly table will act as the base of a go board set up for gluing soundboards and other large pieces. This means I will build a structure mounted to the ceiling that is also multi-functional; it will be the top of the go board clamping system and store some of the larger, longer pieces of wood that line the walls of the shop, as well.

Finally, the assembly table will also act as an outfeed table for the new table saw. I will route a couple of channels into the top and install aluminum (aluminium for those of you in the UK) channels for the miter (mitre for those of you in the UK) gauge and the crosscut sled I will be building soon.

The logical consequence of all this is that my wall space will be increased, minimizing the effects of plopping a HUGE table in the middle of the shop. Once I can store the wood that currently lines the walls in the table/go board setup, I will rearrange the tools and machines to more closely hug the walls. This way, I can make the assembly table the rallying point around which all of my work will be done.


The table is basically a large box with open space in the middle for wood storage. My intent is to not overbuild the structure and I am not gluing the edges because we are renting and I want to be able to break it down and move it without the assistance of four large people. Because we will one day move. I promise.

On an unrelated matter, you are aware I enjoy naming my tools and machines. After several days of intense deliberation I've decided to name the new table saw...Grizz. Yes, it was a stretch, but I'm comfortable with it and the saw doesn't seem to mind, either.

Until next time...

Wednesday, March 18, 2015

Project Update: A Grizzly in the Garage

I was never so happy to see a FedEx truck in my life. I paid Grizzly for liftgate service - thankfully - and the Cool FedEx Delivery Guy helped me drag the package into the shop.


Grizzly builds their shipping pallets so that only one tongue of the forklift will fit under the pallet, but we managed to muscle into into the shop. Once there, I easily removed the cardboard and...uh oh. I couldn't figure out how to get the saw off the pallet.


After struggling with it for a bit, I decided leaving it on the pallet would be okay, it would just add a little height to the saw, right? I took a break and decided to hit it again and, voila!, I discovered the two bolts holding it on just had hex heads that I could easily unscrew using an Allen wrench. Once the bolts were out, I wrestled it to the floor and started the assembly adventure.


These sorts of things are never really much fun. Hey, at least it wasn't an IKEA product. If it were, I'd still be working on it (after having put most of it together backwards). In hindsight, it was pretty easy to get assembled, though it would have been nice to have had a helper, especially with the wings - they're heavy! Regardless, I got everything put on and even had a few spare washers and screws left over.


By the time I finished, it was so late I had to hightail it to bed without ever starting the thing. I'm trusting it runs fine and will be heading down to fire it up in a few minutes. Then...I shall cut something.

Until next time...

Tuesday, March 17, 2015

Project Update: Wait for It...Wait for It...

What's a fella do when he's sold his table saw and is awaiting the arrival of his new one? Apparently, he finishes mundane tasks like putting together a lathe stand and taking photos of his empty shop. The Grizzly 10" hybrid is set to arrive today between noon and 4:00 p.m. and I've received permission from my day job overlord to work at home to receive the package. Yes, I work in the data field, yes, it's for a 100+ year-old company, no, they don't let us work at home. Today is a gift for which I am thankful.


I also have the electric cello project pending. Reed's (my youngest son) birthday is just around the corner on April 9th. All of the parts are here, I just need to get cracking on designing, cutting, assembling, finishing - you know, the easy stuff. The body is a nice maple block that I plan on dying and French polishing. As you can see, I've got everything laid out and know what I want to do for the most part.


Until next time...

Monday, March 16, 2015

Project Update: Saying Goodbye to an Old Friend

In anticipation of the new Grizzly 10" hybrid table saw's arrival this week, I went ahead and listed the BT3000 on Craigslist and, surprisingly, had only one guy call to tell me he could purchase one for $95 off the Interwebs. My response: "Well, then, by all means buy it!" He was not taking into consideration the fact that I had completely refurbished the machine with new pieces and parts, added a $100 upgrade kit for the router and throat and included a 2hp Craftsman router with it. Some will, some won't, so what, who's next, right? The next guy who called paid full price - $320 - for it and was surprised that's all I wanted. Another cool Craigslist dude.


So, I bid farewell to thee, beloved Riyobi BT3000 Cutting System.

Over the weekend, I purchased enough lumber to build out a full 4' x 8' assembly table. As you can imagine, this will become the centerpiece of the shop around which all other tools and tasks revolve. I also picked up enough to complete the go-board top piece/wood storage unit. More on this later.

Along with this, I picked up a couple of stands and a new hand truck. The stands are intended to get my tools off the shop floor and up where I can get my grubbies on them whenever I need to. Besides, I'm old and shouldn't be lifting things from that level. Eventually, I'll mount all of the tools and machines on mobile bases. For now, while I await the arrival of the new table saw this Tuesday (tomorrow!), I'm putting together a lathe stand I also picked up over the weekend.


I've decided that there are two things nearly impossible to achieve on one's own: finding world peace and putting together a lathe stand. Not impossible, but nearly.

Every couple of weeks on the day job payday, I work my way down the street to Gilmer Wood Co. to pick through their bargain barrels for little tidbits. Today, I found another camphor burl, a pretty good piece of African blackwood and a chunk of purpleheart. I don't have an immediate need for these, but one never knows when a slice of purpleheart might be needed. And I got all of them for $10 from Cranky Gilmer Wood Dude. How could I resist that?


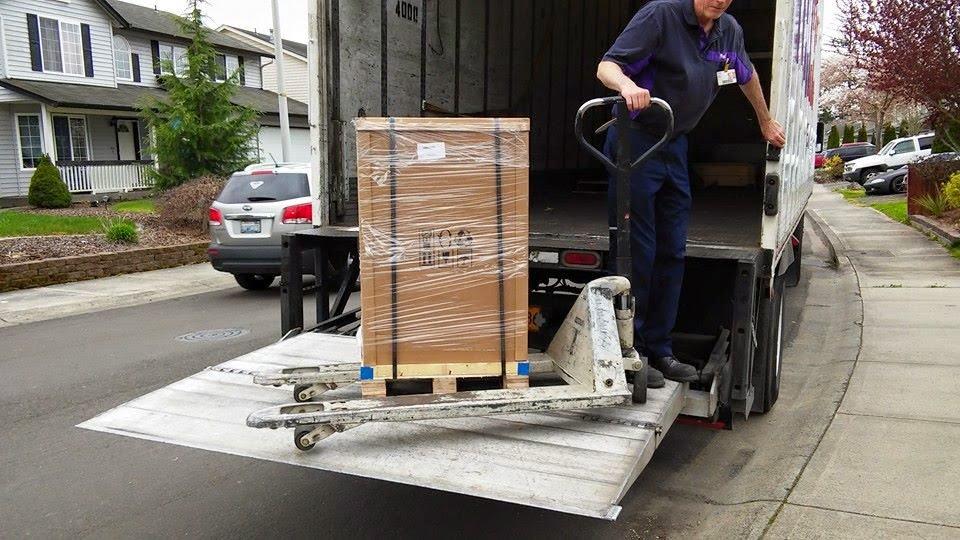
The next update I post, I'll be in the throes of assembling the table saw. I can't wait.

Until next time...

Saturday, March 14, 2015

Day 85: Felt and Machines

Well, I went and did it. The day job gave me an unexpectedly large bonus, so I went ahead and picked up a new table saw. A real table saw. One that won't push wood over a little sideways because the throat plate doesn't fit perfectly. One with a rock-solid rip fence. One with an enclosed case for better dust collection. One with an adjustable riving knife. One with a switch that won't threaten my life using it. One that will cut straight every, single time.


Yep, it's a Grizzly 10" hybrid; it's light, yet sturdy and it's all mine. I ordered it on Friday and it will be here Tuesday. Holy cow, how fast things change at Tortuga Early Instruments Worldwide Headquarters!

Remember when I had to cut the riving knife I purchased for the BT3000 for it to fit with the crosscut sled I built? That was quite a pain, though it was entertaining watching the sparks fly on Big Bertha's old saw blade. The new saw comes with an adjustable riving knife that will save me such trouble in the future.

Before
After

This gives me no reason to not use the safety guard when I'm not using the crosscut sled. Good stuff.

I also found a great deal on a Delta 1hp dust collector on Craigslist for $100. Another cool Craigslist dude met me at the Woodcraft in Tigard to deliver it to me. Now, I just have to get all of my tools outfitted with attachments and I'm all set.


Oh, and I was able to start cutting the felt for the distal ends of the keys. This is the material that the jacks will rest on. More to come on this as I build out the jacks.


So, yeah, I did get a little work done on the instrument this week.

Until next time...

Monday, March 9, 2015

Day 84: Time for a Little Hardening

I was able to get the keyboard finish for both the naturals and accidentals completed over this last weekend and I must admit they look pretty good.


After working with the Tru-Oil on the naturals, I decided to test it out on the arcades and accidentals. I was quite happy with the results because they darkened the oak up only slightly while helping the quarter sawn flecking really pop.


I'm going to leave all of them alone for a few days so they can dry and harden up a bit. The Tru-Oil is really a varnish that is commonly used by gunsmiths to finish gun stocks. It's good stuff and something I'm sure I will be using in the future on all kinds of projects.

The next immediate steps will be to mount the jack felt at the distal ends of the keys and weight/balance each of them. I'm looking forward to these steps because it means the keyboard will be completed soon. I've been at this since May with the maintenance program over the holidays being my only break. I'm anxious to get this phase wrapped up so I can get on to building the case.

With regard to building the case, I'm going to need an assembly table of some size - at least large enough to accommodate the case parts during the build process. Heck, I've needed an assembly table for some time now, I've just never pulled the trigger on putting one together. Now's the time to pull that trigger. I'll be building it as a large (4'x8') outfeed table for the table saw and position it right in the middle of the shop. I'll build in some drawers for storage and make it sturdy enough to accommodate just about any project.

Along with the assembly table, I'm going to mount a structure to the ceiling that will act as the top of a large go board for gluing up the various case parts. If you click the go-board link, you'll see a smaller version used for guitars. I built my first guitar go-board for about $30 using Home Depot parts. In the case of the ceiling mounted version, I'll assemble it using plywood and 2x4s, leaving room between its bottom and the ceiling for wood storage - another benefit of building it. More to come on the assembly table and go-board structure soon.

Until next time...

Friday, March 6, 2015

Day 83: Going with the Tru-Oil. Again.

I posted a photo on the Facebook project page of three options for the quarter sawn oak finish for the arcades and accidentals. The top left is with no finish, the top right is with Tru-Oil only and the bottom is Tru-Oil over the gel stain I mentioned in my last post. I put it up for a vote and, as you can imagine, absolutely no consensus whatsoever was reached.


The Seasoned Builders made the valid and helpful point that the roughness of the wood grain will be a distraction to players and that it should be smoothed over using an acrylic varnish (I can't seem to find this on the Interwebs - I'm hoping it's a polyurethane of some sort). Regardless, I think this is a great idea that I will be pursuing. But, first, I went ahead and put a coat of Tru-Oil on all of the accidentals.


They really do look great, yet the nagging issue of tactile roughness remains.

I am, though, going to apply a couple of coats of Tru-Oil to the arcades and call them good. I started this process by setting up a sanding stick and sanding all of the glue and other detritus from them.


Once I completed the sanding of every arcade - 51 in all - I started the process of applying the Tru-Oil using Q-Tips. This is a somewhat tedious process, yet it's necessary to protect them over the long term.

Tonight, I go on the hunt for "acrylic varnish." Wish me luck.

Until next time...

Thursday, March 5, 2015

Day 82: An Oak Stain Epic Fail

On a recent trip to Woodcrafters here in good, old Portland, I picked up, at the recommendation of one of their knowledgeable and helpful employees, a gel stain to complete the arcades and accidentals. I explained that I was shooting for an Arts & Crafts/Craftsman look for them, so he suggested I try this:


As with nearly everything I do with wood, especially when I have no experience with something, I tested the stain out on a couple of 1/16" strips of quarter sawn:


They look like, in a word, crap.

When I posted the tests on the Facebook project page, I received a flurry of suggestions, most of which were centered on just oiling/finishing them in their natural state. I do not consider this a bad idea at all. I'm going to try some Tru-Oil (which is really a varnish used on gun stocks) on their reverse sides tonight to see how that goes. It will take much less time because I'm going to apply it as Owen Daly originally recommended - with a rag, not a paint brush.

The point of this exercise is to keep them light enough they contrast nicely with the naturals, all of which are capped with African blackwood. I need a hard enough finish on them that playing over the ensuing years doesn't start to wear them down and I believe Tru-Oil is just the ticket. Or maybe not. We'll see tonight.

Until next time...

Wednesday, March 4, 2015

Day 81: Coat Two Completed

I was able to finish up the final five keys last night. Fortunately, I applied the Tru-Oil to them after listening (not just hearing) to what Owen Daly was telling me, so it came right off of this last bunch. They look pretty good, though I need to touch up some of the scribe marks on the heads.


The next steps are to clean up the arcades. When I applied the Tru-Oil to the blackwood, I taped up the arcades (the little decorative pieces on the ends of the keys) with frog tape to protect them from the oil. This left a sticky residue on some of them I will need to clean off before proceeding with staining. I'll do this before I start work on the accidentals, as well.


Once these quarter sawn red oak pieces are stained and finished, I'll glue the jack felt to the distal ends and then balance them using lead weights. You'll see what I mean in the next few days.

Until next time...

Tuesday, March 3, 2015

Day 80: Coat Two Progressing Nicely

I've been working on getting the two coats of Tru-Oil off the naturals for the last couple of weeks. I slathered it on as if it were paint and now I'm paying the price. Owen Daly told me repeatedly that he simply rubbed on the two coats using a rag and that he buffed them up when dry using the same. I chose to ignore his comments and painted the Tru-Oil on using a brush. Ugh. It's taking me several sessions of scraping and buffing to get them finished. Fortunately, I'm down to only five of the 30 left.


This has been yet another great lesson in listening when a mentor speaks. Not only have I picked up Owen as a mentor, I have the benefit of several of the Seasoned Builders taking note of my progress on Facebook. I'm grateful for the attention they give me and I take every one of their comments to heart - when I take the time to actually listen. In my defense, listening can be difficult when I post up a progress note and the Seasoned Builders proceed to post up 35 comments on various topics. I love when they do that, but I think I get lost and end up ignoring what they're really saying to me.

I am resolved to start listening better. Today.

Until next time...