Friday, April 8, 2016

Project Update: Top Mortises Almost Complete

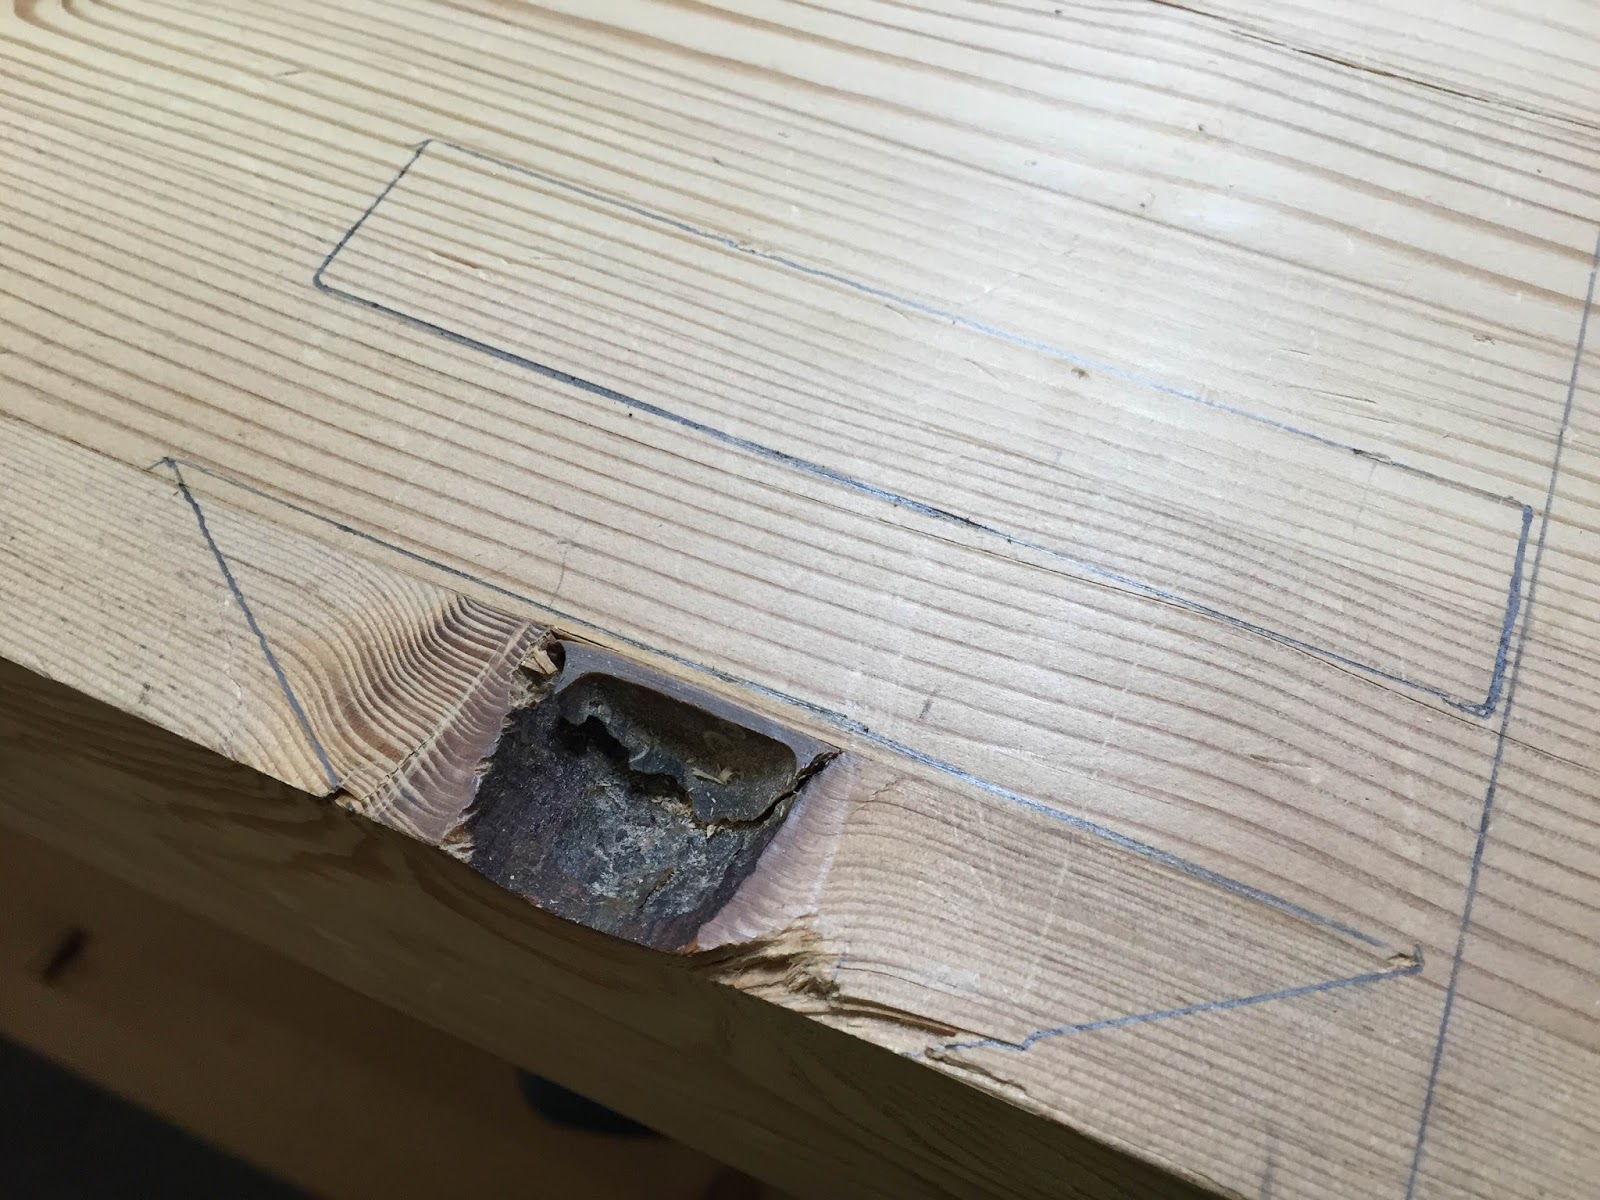
I keep chugging away at those bench top mortises. Since I started kerfing them, it's not been quite as big a challenge as the first one. The photos below illustrate my progress from number two to nearly completing number four.


This is the second one in the photo above and the two below. As you can see, I drilled several holes and then cut a small divot around the entire cut line to prevent tearout (or runout as my British friends say). Then, it was on to kerfing with the jig saw.


And then a simple matter of knocking the kerfs out with a chisel and smoothing a bit.


Once it was completed, I knocked out the third.


And then on to the fourth.


I'll have this last one smoothed down tonight. Once these are completed, I'll start mortising the legs for the runners that will hold the lower shelving for my hand planes. I'll be hitting Crosscut Hardwoods to pick up some Alder this afternoon because, you know, it's "the woodworker's candy store." I'll be able to get started on tenoning and mortising things up (again) late Sunday or Monday.

I have another busy weekend ahead smoking a brisket, some babybacks and sausage (a full-time job on my old offset barrel smoker) and a trip up and back to Seattle on Sunday, so I'm not sure how much progress I'll make. Thank goodness for Monday so I can rest and get back to work in the shop.

Until then...

Tuesday, April 5, 2016

Project Update: Making Square Holes

After working so hard on the first rectangular mortise, I decided to actually listen to Random Roger Green and move forward with the kerfing approach I mentioned in my last post. The first step in this approach is to drill holes large enough for a jig saw blade.


For this task, I switched from the Forstner bit to a brad point bit. It's important that the holes meet from both sides; that way, the jig saw blade has enough freedom of movement to not bind or break the blade. Once I got both sides drilled, I cut a rough hole and then cut kerf lines from the hole to the outlines of the mortise.


This looks pretty funky, but it was easy to do and quite effective in helping me move along at a much faster pace. The photo below illustrates about ten minutes of work with a 1/2" chisel.


When cutting the small sides, I am effectively cutting end grain, which is really quite difficult to do. But, if that's the hardest part of this approach, I'll take it. Speed and accuracy are of the essence now, so I can get back to this:


On a completely unrelated note, Mark Roberts of Mark Roberts Guitars and Ukuleles recently posted an interesting hack on his Facebook page regarding the use of a little IKEA light for one of his band saws. If you've ever used a band saw, you know that lighting is a constant challenge. So, I followed Mark's lead and purchased two IKEA JANSJĂ– LED lamps with clips on the ends, rather than a base. They're lensed, which means the light both spreads and focuses as you move it around and they work great for both of the band saws.


Total savings: $150. Thanks, Mark.

Until next time...

Monday, April 4, 2016

Project Update: The Mortising Continues

Last week, I got the third...


and fourth...


dovetail mortises completed. I can now see why hardwoods are much sought after bench materials. This fir is so soft and tears out so easily it's been pretty difficult to get straight joints worked up. It can be quite frustrating, but, as my friend, the Dutch Luthier (Jan van Capelle), reminded me: I can swell gaps and goofiness up a little later with some well-placed water droplets.

You can see the result of cutting out a single mortise in the photo below. It is, as I like to say, all in a day's work.


Once I was reasonably satisfied with my work on the dovetails, it was time to work on the rectangular mortises. First, I drilled a few holes on both sides using a Forstner bit.


I started on the bottom and finished on the top. In hindsight, I probably should have used a smaller bit and finished up with a jig saw to cut finer lines from the holes to the sides, you know, as Random Roger Green recommended. This is basically kerfing that would have allowed me to work the chisel using the jig saw cuts as index lines and it would have split the pieces that needed to be cut into finer, straighter chunks.

Like anything in the woodworking world, there are as many ways to cut mortises as there are woodworkers. As I say about harpsichord builders, ask ten woodworkers for advice and you'll get twelve good, solid answers.

Oddly, I didn't take any progress photos while trimming out the first rectangular hole. I took one when I was finished for the day; fatigue had started to set in and I was becoming sloppy.


As you can see, I still have a little cleanup and straightening to do. One thing I'm learning about working in the shop is to discern when enough is enough. I had been enlisted on Saturday to smoke some meat for a friend's meatfest gathering and I made the faulty decision to work on the hole after cooking for six hours and joining in the meatfestivities. This was a choice for which I am still paying with a fair amount of pain and suffering. The great irony in all of this is that I'm currently working on a book and videos for woodworkers about stretching, planning, scheduling, knowing when enough is enough, etc.

I guess it's time to start walking my talk.

Until next time...

Friday, April 1, 2016

Project Update: Cutting the Leg Dovetail Mortises

Once the leg tenons were done, I could start the exacting process of lining out the leg mortises and cutting them. After a lengthy discussion with Random Roger Green, we decided that the left side legs would be placed twelve inches in from the left side of the bench. The right would be eighteen inches in from the right side. The first thing I did was draw reference lines.


The line on the left side is a center point for the leg and the right one will meet up with the right side of the leg. You can see in the photo immediately above that the right side line interferes with a nice, little knot. This prompted a management decision. I moved the line to 17 1/4" so the mortise would take out 99% of the knot (I know the measuring stick says 19+ inches - this line was to give me some idea of how to place the mortise). I then placed the leg tenons onto the bench top and drew them on for each mortise. This is done because every mortise, no matter how skilled the woodworker, is going to be, let's say, unique in its own way. Drawing them captures these unique qualities.


I discovered something interesting when transferring the drawings to the reverse of the bench top: I simply drew index lines down the sides of the top and matched those up with the tenons. This worked perfectly - for me. Random Rog would probably look askance at this, but he wasn't there, so I had to do what I had to do. And it worked out just fine.

The next step was to cut the angles with a hand saw. Now, you know from my previous posts that I'm not exactly the handiest guy with the back saw. In my defense, the saw that gave me the most trouble was Random's big, heavy back saw. I just could not control it well enough to get a straight cut. This is partly due to the Carpal Tunnel Syndrome surgery I had a few years ago that significantly affected my poor, old hands; they become swollen and fatigued quickly these days.

What I ended up using was one of Random's little 14 tpi (teeth per inch) carcass saws, which is intended for crosscutting. It's light and easy to use and I was able to cut the angles with patience and a light touch, which was actually kinda pleasurable in its own way.

Another lesson Random Rog taught me is to use a good, sturdy clamp as a handle to turn the top for working the various sides and angles. Random was kind enough to loan me a beautiful Bessey clamp, but it ended up being too long for my purposes, so I just used one of my Rockler aluminum beauties.


Like most things Roger teaches me, this works remarkably well. There's something about the leverage the handle provides that makes flipping the monster (I estimate it's about 350-400 pounds) easy, even for a guy with a bad back and swollen hands.

Once I got the thing on its side, I could start cutting the angles. The next three photos illustrate the line drawings around the right side knot and how I hogged out the negative space with a chisel.


As I was working on it, I sent a message to my wife, Tonya, that I'm now embroiled in an increasingly torrid love affair with a 1/2" chisel from Germany. She was unmoved.

From this point on, it was just chiseling and shaving and straightening until the mortises were done.


Once I have the four dovetails completed, I'll start their rectangular siblings. Given my schedule, I anticipate I'll have all completed by the end of the coming week.

Until next time...

Wednesday, March 30, 2016

Project Update: And Then There Were Four

Completing one of the Roubo-style workbench leg tenon cuts really motivated me to get the remaining three behind me. So I did.

First, there were two.


Then, there were three.


And then there were four done.


And no, the red paint will not appear on the final product. The legs all have a spare 1/4" that I will shave off when the bench top is fixed into position.

As I worked, I noticed that I should have taken a little more care about where I chose to place the tenons. Another good lesson learned. For instance, while things looks pretty good from this angle,


they don't look so great from this one.


I probably should not have included the knot in the cut. Regardless, there is enough real estate in the negative space and the little notch that things will work out fine in the end. Besides, I need legs on the back (hidden) side, too, right?

The next step is to either cut the shelf runner mortises into the bottoms of the legs or start on the bench top mortises. I'll be conferring with Rangom Roger Green today to decide on which path to take.

Until next time...

Tuesday, March 29, 2016

Project Update: One Down, Three to Go

After resting for a couple of days, I decided to dive into cutting the tenons for the Roubo-style workbench legs. The first step was to cut the 30-degree dovetails using the new jig and a little 14 tpi crosscut carcass saw.


As you can see, the Laguna did a pretty nice job working with the cradle jig.


Though I finished the dovetail cuts on all of the legs, I only had time to complete all of the cuts on one leg.


I used the Delta 12" band saw to clear out the negative space and cleaned it up with a razor-sharp 1/2" chisel loaned to me by the inimitable Random Roger Green. In reviewing my work, I noticed a little tearout on one of the legs, so I toothpicked a little glue in and taped it up for drying.


It will be right as rain tonight.

My wife, Tonya, and I are going to look at new cars tonight, as well. I see a minivan in my future. Yes, I've grown weary of carting wood and power tools around in a KIA Rio. If they can lower my payments, we'll have a deal. If not, the Rio will have to do.

Until next time...

Sunday, March 27, 2016

Project Update: Parting is Such Sweet Sorrow

After much deliberation and a shot or two of Pusser's, I came to the conclusion that using the Delta 6" jointer twice in the last year meant it had to go to free up some room in the shop. Frankly, my preferred way of jointing/smoothing a board edge is to simply use the table saw. Thus, I had to release the machine  into which I had put so much time and effort. I purchased it from a Cool Craigslist Guy some time in late 2014 and spent the Winter Break refurbishing it in early 2015. You may recall the posts; if not, here's a refresher.


The condition in which the little fella came into the shop was, shall we say, not good. I spent a significant amount of time getting intimate with it using a wire brush wheel on a cordless drill.


I also replaced its drive v-belt with a link belt.


The result was, admittedly, pretty awesome.


I even replaced the little switch/name plate. You can also see in the photo above that I procured a mobile stand for it, which was a blessing. I was thinking during the refurb, "Gosh, I need to make this thing mobile like everything else in the shop." I jumped on Craigslist and, voila! - there was the mobile stand made precisely for this particular machine. And for just $40. Thanks, Cool Craigslist Guy.

But, the only constant at Tortuga Early Instruments Worldwide Headquarters is change. It really was quite difficult for me to make this call, especially since I had worked so hard on sprucing up the jointer. Finding a mint condition Craftsman 18/36 open-ended drum sander for $500 less than a brand, spanking new one helped with the decision; it was located in Mukilteo (northwest of Seattle), the place of my former abode, so my wife, Tonya, and I made the road trip yesterday to fetch it. It's amazing what you can fit into a KIA Rio.


The new machine now fills the hole where the beloved jointer once rested. This tool is a game-changer for me, especially given my physical challenges (getting older combined with a profession that has required me to sit on my butt for the last 30+ years = pain and suffering during and after sanding). Now, I can fine-sand just about anything my heart desires with a minimum of effort. I had always dreamed of having a drum sander of this size and quality, yet could not see a clear path toward acquiring one. I suppose the lesson here is to be careful what you wish for.

Until next time...