Before jumping onto the creation of the upper belly rail, I decided to complete the cleanup of the cheek/bentside joint. I had cut off most of the overhang last week and borrowed a couple of tools from Random Roger Green (yes, again) to finish the job: a face float and a low-angle bench plane. The face float is an interesting tool. Basically, it's a (in this case) draw rasp that's offset with a nice handle.
The thing is, though, the offset allowed me to rock the float while using it and I dug into the side of the instrument about 1mm. Frustrating, but not a game-changer - I'll just putty it up a little, which is fine because, as you recall, I'm veneering the case with quarter sawn red oak. I'll be more careful next time.
Ultimately, it was the low-angle block plane that did most of the heavy lifting - 1/1000th of an inch at a time. It took a while, but I'm pleased with the result.
Before tackling the upper belly rail, I went ahead and threw in the keyframe support blocks.
And puttied up and sanded a few of the screw and nail holes left from jointing the case sides.
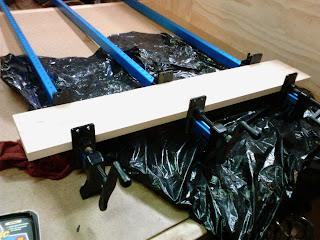
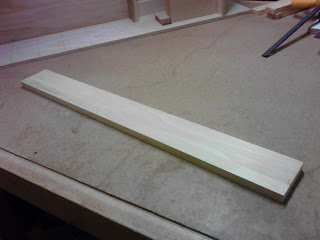
I then took up the matter of creating an upper belly rail for the instrument. This part is made from poplar, like most of the instrument, and is dimensioned at 11/16" x 3 1/2" x 30 5/8", so I went to my stock to see what I had available. I did have a nice, big piece of 3/4" x 12" poplar, but it pained me to think of cutting it up in this way. I quickly realized I could simply plane and joint a thinner piece and cut it to dimension. And I got to make real use of the new Roubo-style bench for the first time!
So, there you go.
This part has a couple of interesting cuts in it, as well: a dado and a rabbet. A dado is a slot cut into the board and a rabbet is cut on the edge. In this case, the dado was to be 1/2" from the bottom, 3/16" deep and 3/8" wide. I decided the best way to cut this was on the table saw with repeated passes, so I went to town - only to discover my depth gauge had misled me (it had somehow slipped from 3/16" to 1/4"), so I decided to fill the dado and start over.
I left it a bit rich so I could plane it smooth using the Roubo and a couple of the new dogs I made (more about these later). I planed it down using my refurbished Stanley Bailey No. 7 and it worked like a charm. I must admit that it was really nice having all of the parts, pieces, and tools, including my intent, come together around this little task. I eventually got the dado cut and will be cutting the weird, little rabbet tonight.
On a tangentially related note, I've been working a devious plan to make my own bench dogs for the new workbench. Roger Green recently introduced me to a cool concept from Time Warp Tools: wooden dogs. These are a great idea because a brass or aluminum dog always has the potential of ruining a perfectly good hand plane blade.
After reviewing the Time Warp Tools version, it occurred to me that I could probably find the spring-loaded rollerballs somewhere on the Interwebs. I did - on eBay from a company in England. I ordered a pack of 10 for $11 with free shipping and sat back to wait a month or more for them to arrive. Wonder of wonders, they arrived the next week. Vive la Par Avion!
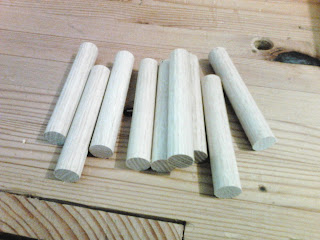
Once they were in the shop, I scooted over to Home Depot and purchased two 3/4" oak dowels and start cutting and drilling. I wanted a harder wood like ash or oak, rather than a softer wood like poplar, because they would be holding boards on the bench under some pressure.
The roller balls are actually door latches. I glued them in with a little activated Gorilla Glue and just used Titebond on the leather pieces. In the end, I made ten dogs for under $20, rather than spend $9 each + shipping from Time Warp Tools. Sorry, Cool Time Warp Dudes.
As you can see, the spring-loaded roller ball takes the place of an awkward spring thingy. You can also see a couple of them at work in the upper belly rail screwup fix photo above. Now, back to that belly rail.
Until next time...


No comments:
Post a Comment