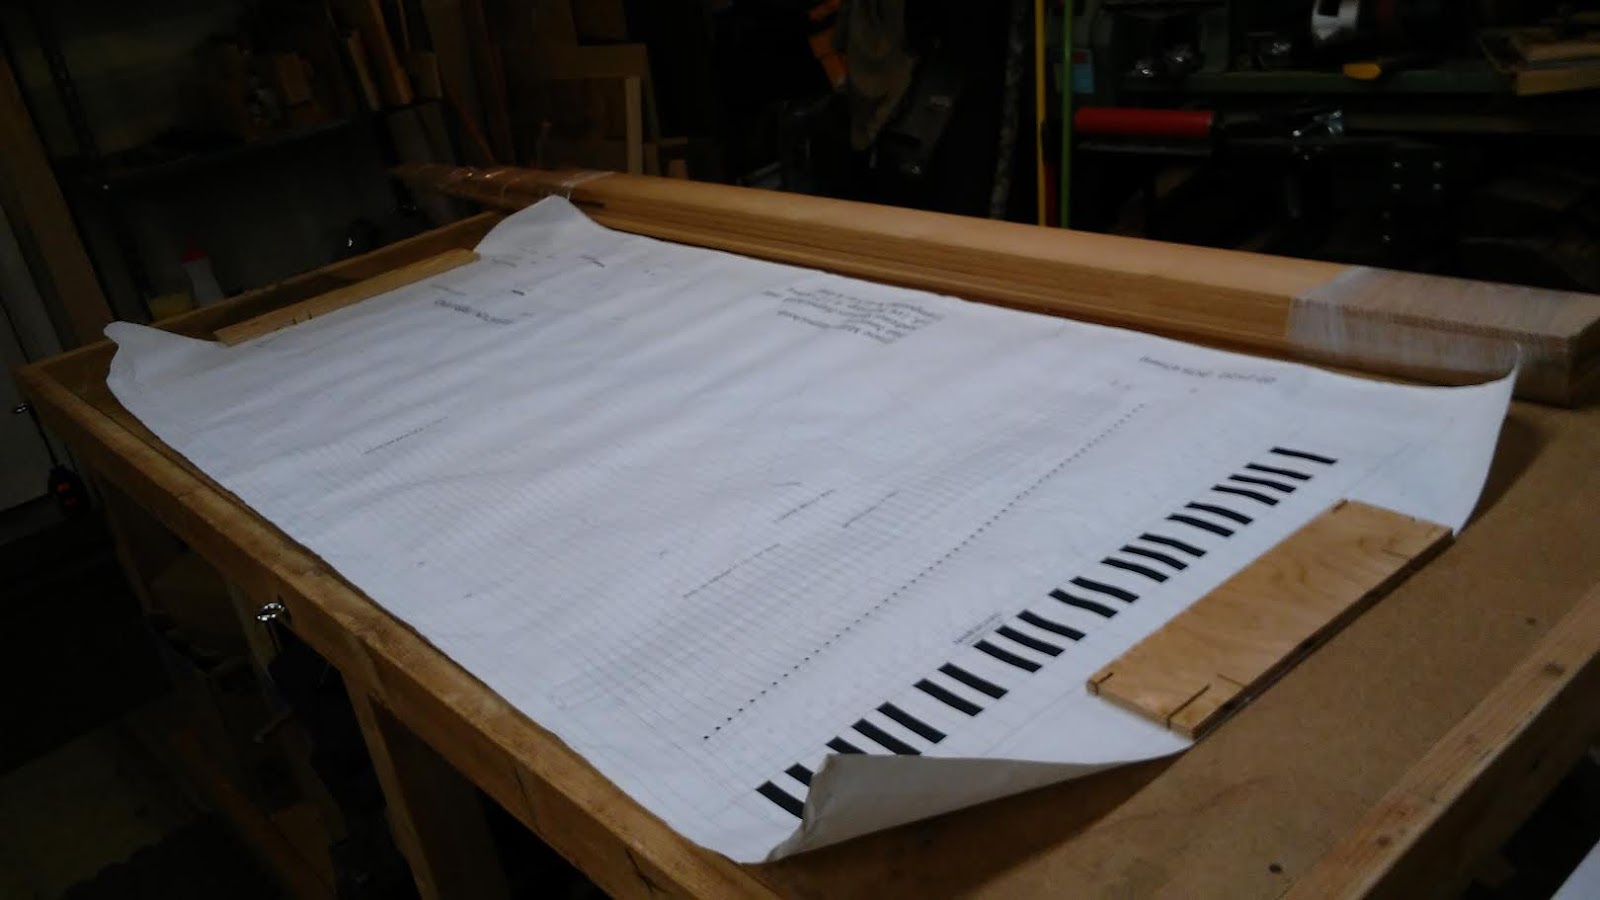
When I first started the instrument, I did not slow down to take the time and care to triple-check my cuts before making them. In the case of the nameboard, I got the dimensions of the board correct, yet I completely screwed up both the size and placement of the three lever windows that are cut into it. These are openings for three levers that will activate/deactivate the eight-foot, four-foot, and buff "stops". As I install the levers, I'll explain more about these.
Well, I finally got around to fixing my initial screwups by filling the middle hole with putty and scraping it down on both sides. This is not as bad as it could have been, primarily because I'm veneering any exposed poplar. In this case, the middle hole was off by several inches, so I was able to recut it in the proper place once the putty dried and was scraped flat. In cutting this hole, I also discovered none of them were the correct size (1" wide x 1/4" tall). Again, I'm not quite sure what I was thinking - or not thinking - when I cut them and I can tell you it would have been a damn sight easier to have cut them correctly before gluing in the nameboard.


The holes look a little rough, but I'll be re-veneering the front and also framing each one with a little African blackwood that will clean up the angularity of the holes while providing the Craftsman accenting I mentioned above.
Once I got the windows properly cut, I turned my attention to the soundboard. Now, Mr. Miller directs us in his eBook Most Excellent to make the stand after the registers, but I'm going to save that for dead last - even after I've made all of the jacks. So, I started by determining how to slice up some lovely spruce boards I purchased from Alan Ollivant some time ago. The boards are 1/2" thick and most are just over 4" with some over 5" wide. I decided that I'd like to maintain some consistency in board width and stuck with 4" as my primary measurement.
Once I picked through the boards, I started the process of measuring how many I would need to fit the width (just under 32") of the instrument, as well as accommodate the changing length caused by the bentside.

If you've read any of my other blog posts, you know by now that I harbor an enormous capacity for screwing things up (evidenced by the nameboard window description above). So, I double- and then triple-checked the lengths because messing up the beautiful, tight-grained Alan spruce would have been cause for moving on to another project.
Here's what I determined I would need:
- 3 x 60"
- 1 x 50"
- 1 x 40"
- 1 x 30"
- 1 x 20"
- 1 x 14"
Perhaps you can detect a pattern there? Given the fact I settled on 4" width for the planks, I'm probably using more of them than your typical builder, but that's what I've got to work with at this time. I would also very much like to switch to metric on the next build, but that's a story for another post. Regardless, I positioned the Laguna SUV and started cutting.


In my enthusiasm to get the boards cut, I was not as attentive to the time as I should have been. Time is important in this case because in order to resaw boards of this length, I needed to open the garage door (yeah, it's a tiny shop). After the second cut, I happened to glance at the clock and notice it was approaching 8:30 p.m., so I decided to defer the final cuts until the next day. Arousing the ire of neighbors is not part of my game plan.

As you can see, the game plan eventually worked out fine. Following Mr. Miller's and Owen Daly's advice, I resawed the boards as close to 1/4" thickness as I could, given the fact the boards were 1/2" and the saw blade, though quite thin, cut into that 1/4" a bit on either side. After jointing, I'll be taking the soundboard down to 1/8" (3mm) and thinner in some places, so I'm all set. The final step was to cut the planks to length, which I did with a hand saw.
From time to time, I do something that amazes and, frankly, confounds me. A couple of years ago, I found a completely rusted out Delta 6" jointer on Craigslist and picked it up for $80. I spent considerable time and effort restoring the thing and even found a factory mobile stand for it for only $40. It sat in my shop for the better part of two years, so, in my infinite wisdom, I decided to sell it. And then I needed it the very next day. It still rankles.
Given my poor choices, I'm going to take the soundboard planks to Random Roger Green's amazing shop to use his monster Powermatic/helical blade jointer to whip them into shape. I'll probably end up gluing them there, as well, but I'm not 100% sure about that. What I am sure of is that they're wrapped up and ready for the trip to Random's domain.

When I joint the boards, I'm going to use good, old-fashioned hot hide glue. This is not something I've ever done, but I do want to use the stuff as I build more instruments. Owen Daly has been very helpful in this regard as I've watched him glue up instruments over the last couple of years. In fact, he was kind enough to sell me a couple of bags of 192-gram strength glue chips for my own purposes. Gram strength determines a few things, not the least of which is "open time" - the amount of time you have to glue something up before the glue becomes too tacky - and the ultimate strength of the joint you're gluing (more on this later).
True, you can purchase hide glue in a couple of ready-to-use forms such as Titebond Liquid Hide Glue or Old Brown Hide Glue, both of which use a chemical treatment (urea?) to keep it liquid, or close to it, at room temperature. Both of these work because hide glue reaches its ultimate effective holding power when it evaporates off the water that keeps it in its liquid state.
There are two reasons I decided to go with cooking my own hide glue, rather than purchasing Titebond or Old Brown: 1) The two are rather expensive for my tastes; since I'm the client on the current instrument, I'm also a bit cost-sensitive and 2) I want to control the liquidity/open time of the glue myself. When Owen sold me the glue chips, he also gave me a small container of urea pellets, which can be used sparingly to increase the glue's open time, if necessary.
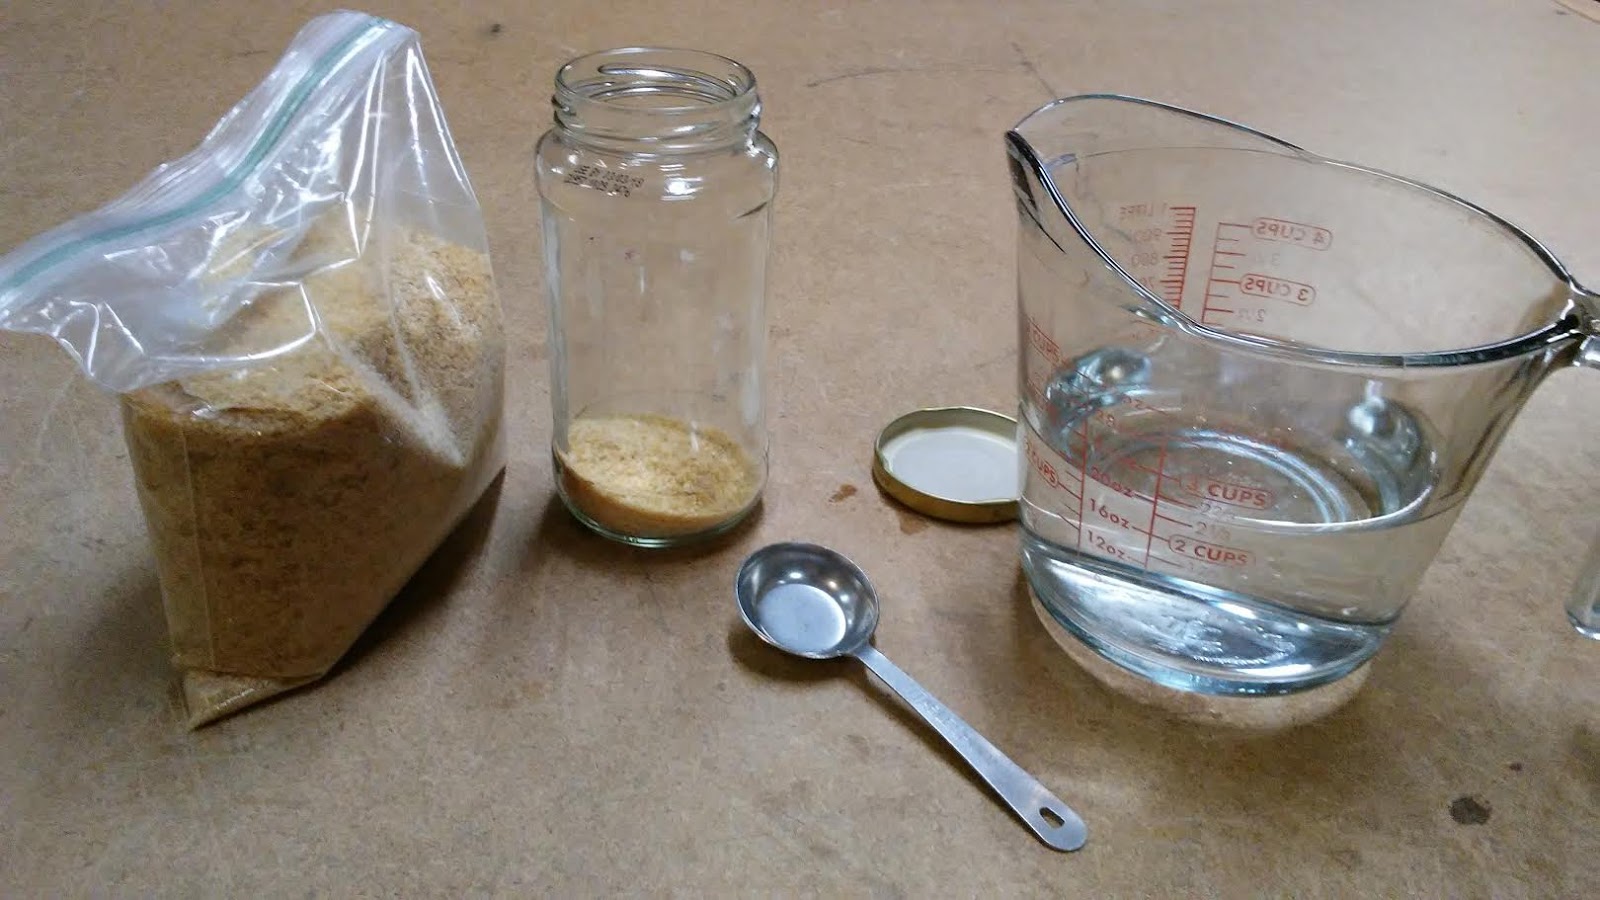
The first step in cooking the glue is to rehydrate it by putting a little into a container with some water in a 2:1 ratio of water:glue chips. Some say to soak it for 10 minutes, others say overnight. Given my time constraints, I went ahead and left it sitting in the shop refrigerator overnight.

Rather than purchase one or more $135 Hold Heet Glue Pots, I decided to follow my friend, Jan van Capelle's (The Dutch Luthier), advice and pick up an inexpensive teapot thingy (around $15) to create a double boiler for cooking up the glue. The key is to bring the glue up to 145 degrees to properly cook it and prepare it for use.
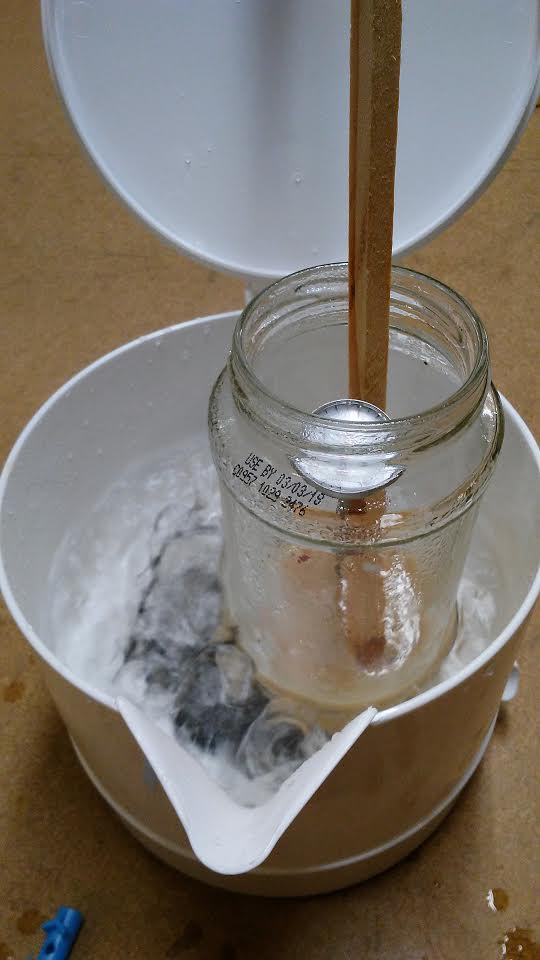
I then tested it on some scrap and completely forgot that sizing is a good first step for using hide glue. Sizing is the act of putting some glue, typically diluted in a 10:1 ratio of water:glue, one or more times on your project pieces and allowing the wood fibers to soak up these initial coats. Hide glue is the only glue that will glue to itself. The modern plastics will not do this. Hide glue also allows for a reversible joint simply by adding heat and moisture to it. In my case, I'll remember not to put the instrument in a hot bath.

Because I neglected to first size the joint, my test was something of an epic fail. This is not a bad thing because it reminded me to size and that hide glue takes a very long time to fully set. This was a good lesson at the expense of, well, nothing, so I'm grateful to have been reminded.
The next step will be to re-veneer the front and veneer the back of the nameboard. This will be "fun" because I use 3m spray contact cement and that crap gets everywhere. The next photos you see will be the instrument with tarps and newspaper taped all over it. Ah...the joys of not knowing what I was doing early on (not that I really do now, right?).
Until next time...
No comments:
Post a Comment