 |
| Image from The Harpsichord Project E-Book 4.0 by Ernest Miller. |
As you know from previous posts, I've been preparing to cut the bevels into the bridges for some time now. Frankly, I was scared sheetless to do it because I couldn't bear the thought of ruining another set, but, hey, it's all good, right? Fortunately, I attended a Western Early Keyboard Association (WEKA) event recently and was able to get a good look at some example instrument bridges. Owen Daly was in attendance and was kind enough to give a short clinic on making bridges, which also helped enormously.
I took photos of the instrument at the event, but it turns out they're not very illustrative. The rub for me in cutting the bridges was related to how wide the top of them should be. While Owen was telling me they should be a consistent size (pretty thin) from the larger to the smaller ends, Mr. Miller's eBook Most Excellent describes a top thickness that is variable from end to end. After viewing the instrument at the WEKA recital, I realized they could (should?) be the same width from one end to the other - no disrespect to Mr. Miller whatsoever. And, as Owen said at the WEKA event, "The bevel angle should be determined by the width of the top of the bridge before the outside bevel is introduced, not by an arbitrary degree measurement."
I know this may all be a bit abstract. At the end of the day, Flemish instrument bridges end up being weird variable trapezoids that change in size from one end to the other. The 8' bridge is 3/4" at one end and 1/2" at the other and the 4' is 1/2" to 1/4". I'll be illustrating in greater depth how they work in subsequent posts - it's really too much to fully explain here. Suffice it to say the bridges act as terminal resonance points for the strings between them and the nuts - just like on a guitar. On both instruments, the termination points of the strings (i.e., where they are secured to the instrument) are less important than the location of the nuts and bridges because the distance between those points determine the notes played by the strings.
Whew. Just a second, I need to catch my breath. Okay...we're back. Now, Mr. Miller has devised an ingenious way to cut the bevels into the bridges BEFORE BENDING them. Owen, on the other hand, cautioned me against this approach due to the potential for twisting post-bend. As always, I was willing to give Owen's recommendation(s) a shot and went ahead with the cutting, steaming, and bending of both bridges.
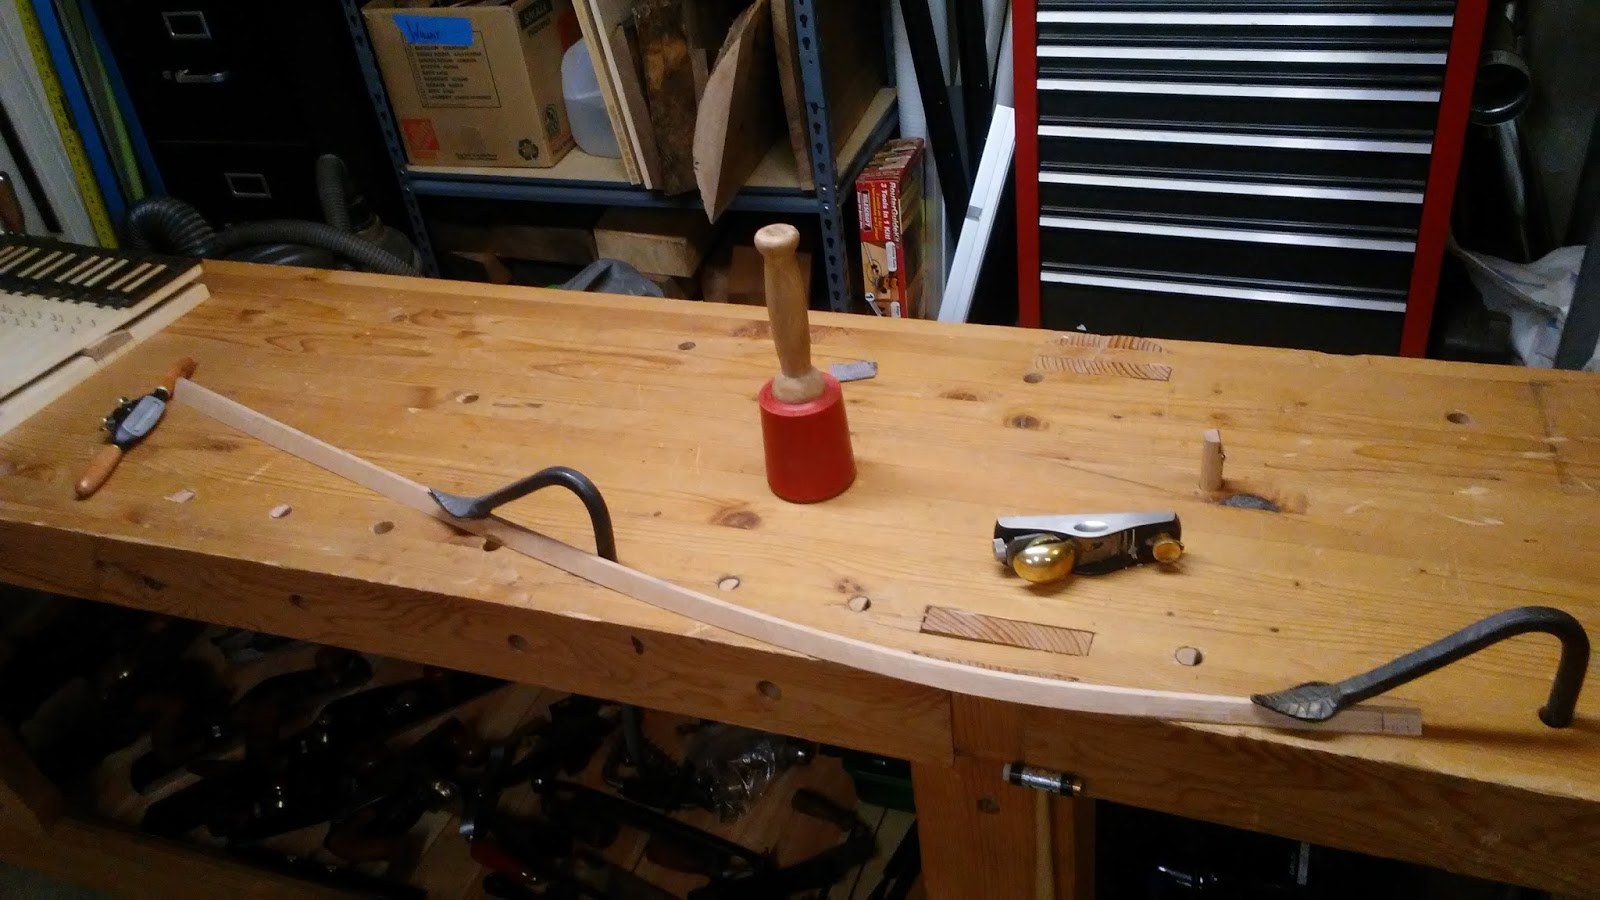
As you may recall, I tried bending the bridges using the bentside form. Not a good plan. This time, I made the 8' bending form, steamed the bridge, got it onto the form for a couple of days, and, viola! - it actually worked. A nice, curvy, uniform bend with little springback was the result.


I was so pleased with the result that I forged ahead with setting up a 4' curve on the same form and got the 4' bridge steamed and bent.


Now, this is where I took a pretty substantial break for fear of screwing up (again). Once I gathered up the requisite fortitude, I went ahead and set the band saw at 30 degrees and ran a test cut.

When I compared the test against the "old" bridges, it was a nearly perfect match, so I went ahead and cut the 8' bridge bevel.

The next step was to clean up the band saw marks. I initially used a spokeshave, but found it to be a bit rough, especially since I had not honed the blade after purchasing it. In the interest of expediency, I switched to the Lie-Nielsen low angle block plane, which made quick work of the cleanup.
I was so pleased with the result, I moved on to cleaning up the 4' bridge, yet I found that a little ebony luthier's plane worked best on that one. The added benefit was that the ebony burnished the wood as I planed it down, resulting in no need to scrap or sand.

Still, there remains the matter of adding the hook to the bass end of the 8' bridge. This part of the bridge curves at too sharp an angle to bend on the form, so we just cut one to angle and tack it onto the bridge at just the right place. In the photos below, I'm tracing it out and preparing to cut it, but, alas, it got too late and I didn't want to suffer from spousecide (she goes to bed much earlier than I).


On a couple of completely unrelated notes, I am now and probably always will be a sucker for swag.

I'll most likely order a few, but with our tag line "Tardus et stabilis..." (Latin for "Slow and steady...") and the web address. The quality of the pen is pretty high, which is nice.
I also got the dust boot installed onto the CNC machine, which is the culmination of an interesting story. When I picked up the machine after driving to Waldport, Oregon from Vancouver, Washington - about a 4 hour trip each way - I asked Cool Craigslist Guy about the dust collection he advertised on the CL ad. He said, "Oh, yeah, here it is," and handed me a Dust Deputy funnel and sawdust bin. I thought, "Well, okay, I guess I'm saving enough it doesn't really matter."
A couple of days later, I received an email from him saying he forgot to give me the Suckit Dust Boot (you know, the dust collection he advertised on CL) and that he would be shipping it to me post haste. All good, right? Well, when I got it, I discovered so many parts were missing it rendered the boot unusable. So, I contacted the Suckit people to see if I could purchase the missing parts. The wonderful person there said, "We love the fact you purchased it on Craigslist. If you send me a photo of what you have, I can send you what's missing."
After emailing Jenn a photo, she let me know they'd be replacing the missing parts and shipping them to me free of charge. Holy cow, I was flabbergasted. In a consumeristic society like ours in which everything has a price, a company exists that cares more about customer satisfaction than making a buck. My hat's off to the Suckit people - you rock.


The assembly was made easier by following a video on their website and I now have a CNC machine that looks an awful lot like an elephant. If it keeps the shop largely free of CNC-created sawdust, I'll take it.
Until next time...
No comments:
Post a Comment