I then drew a line on the bottom of the soundboard using the outside of the case as a guide. Eventually, I will need to trim the cheek, bentside, and tail sides down by 1/2" to make it match the inside of the case, but, for now, it gets an outside line.

Next, I'll use a jig saw to cut along the line and work on the 1/2" line after that because I'd like to clear some material away before making that final cut.
Along with the soundboard work, I made the management decision to go ahead and replace the upper and lower registers with beech versions. The poplar registers just weren't working for me. They were pretty ragged and flimsy and, after seeing some of Bill Jurgenson's beautiful beech register work on Facebook, I thought, "Hey, I can do that!" So, I started by cutting a 6" x 32" inch piece of beech from a 3/4" x 8" x 96" board and resawing it down to 1/2". I then ran it through the planer to smooth it and get it down to a true 3/8" piece.

What I neglected to mention above was how my decision to make my own jacks also affected the decision to make new registers. Rather than use the plastic Hubbard jacks recommended by Mr. Miller in his eBook Most Excellent, I decided to make them 1/2" wide, yet the same thickness as the previous ones because I'm still using Owen Daly's custom table saw blade for the jack thickness cuts. In the end, I also needed to attend to the width of the registers themselves because there's not much wiggle room between the two based on parts I've already installed.
I also decided to cut a slant into the upper registers to accommodate jack movement when turning the registers to the "off" position. This essentially moves the jacks for that register to a slanted position, thereby pulling the plectra (the things mounted in the jacks that pluck the strings) away from the strings; they still pop up and down, they just don't produce string vibration and, hence, sound. Rather than build a custom jig or chisel them out by hand later, I decided to use the Incra miter gauge I picked up a while back.
First, I lined out the cuts using a marking tool and an "old" register that I sawed apart to re-open the comb. I made a 10-degree cut for each register slot. I then lined each slot up with the saw blade (yes, the saw was shut off each time) and clamped the register to the miter gauge, turned the saw back on, and made the cut. Contrary to most of my great ideas, this worked remarkably well.

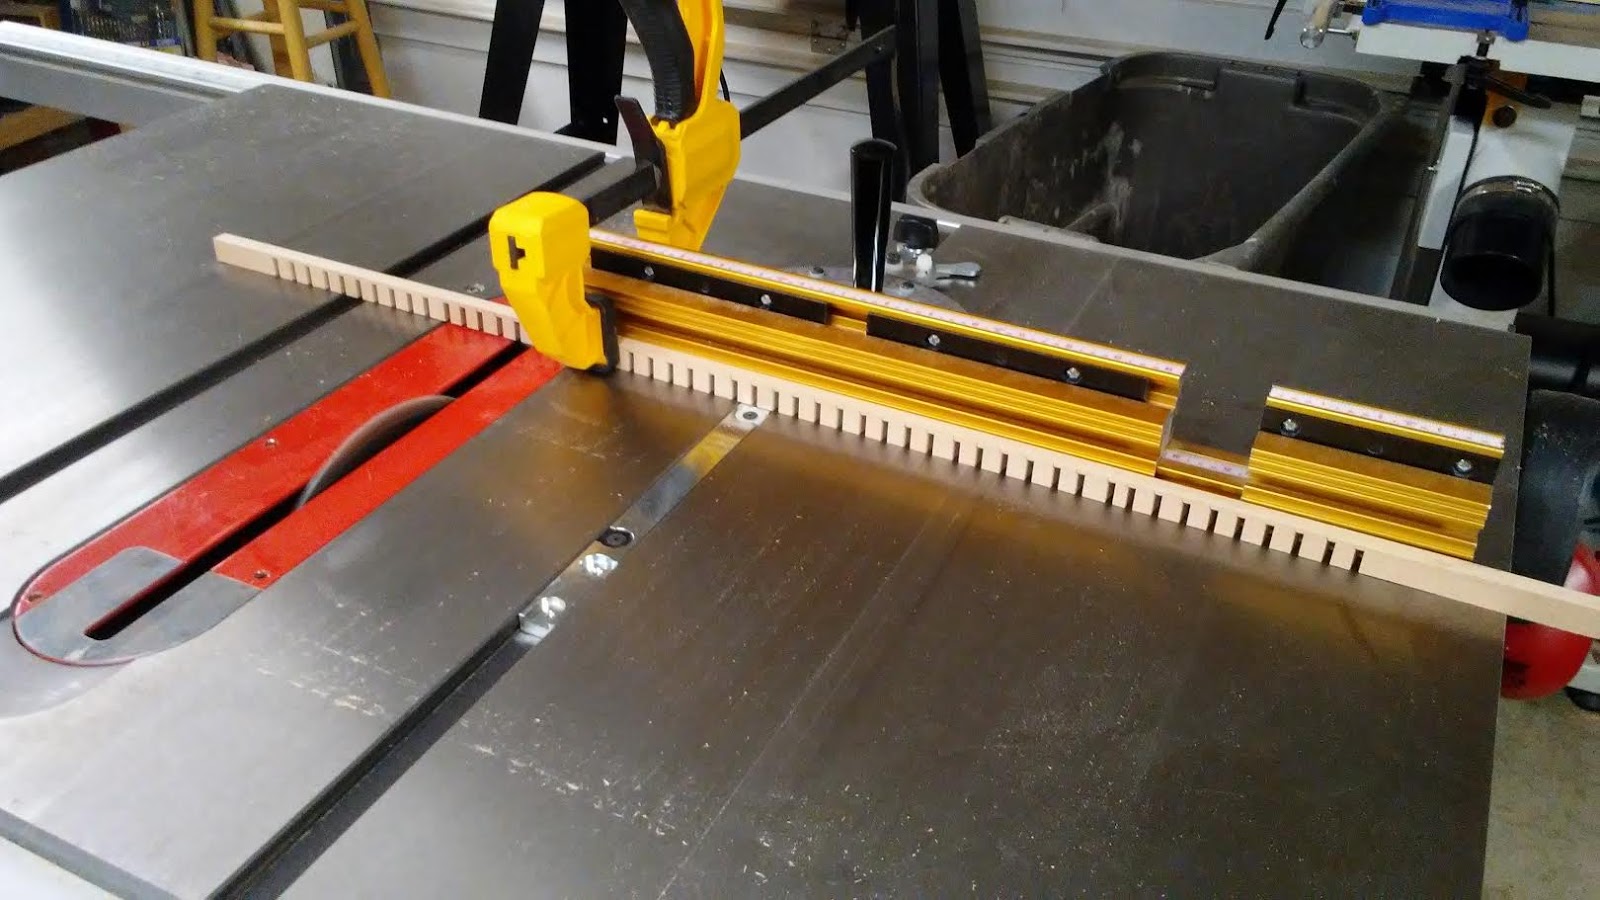
Before proceeding too far, I checked the cuts and was fairly pleased with what I observed.

I then finished up the angled and straight cuts and found that they still needed to be cleaned up a little with a razor knife blade. I only sliced about 1/2 mm into my left thumb, so no blood, but plenty of excitement.

Once I completed the cleanup, I put the piece I will use to "close the comb" close to the register to gauge what it would look like and I was quite pleased that it not only provides plenty of stability, it is also perfectly matches the width and height of the "old" registers.

Not too shabby at all. One concern I had was with a miniscule amount of tearout because I had neglected to use a backing board when cutting the slots. Such a board is simply used behind whatever one is cutting on a table saw to prevent "tearout" - the detritis left on the back side of a cut. The absence of a backing board was also mentioned to me on Facebook by Michael Johnson, a master harpsichord builder from London. So, I taped a backing board onto register number two and went to work.


Now, I had virtually no discernible tearout on register number one. And, wouldn't you know it, guess what I observed on register number two. Yep, a little tearout between two of the slots.

This is pretty wild stuff. The backing board's sole purpose was to prevent this and, well, there you go. Overall, the cuts were cleaner, it was only this one that felt the need to remind me that I'm still just an amateur. And, speaking of being an amateur, as I was cutting the piece to close the combs of the registers, I experience my first bona fide kickback. And it hurt. I was using a push stick that kicked out of the blade and into the palm of my hand.

It doesn't look like much, but it hurt like a mutha, yet just for a little while. I decided at that point it was probably time to call it a night.
On a completely unrelated note, I received a book a couple of days ago that is profoundly important to me. I've connected with Bartolomeo Cristofori in a way I cannot yet fully articulate, or even understand, and will, someday, build a copy of his 1693 spinetta ovale instrument. Owen has recommended I not do that and concentrate on a "little Italian" for my next build, so I'll be following Owen's recommendation, yet Bartolo and his fantastic oval spinets (virginals, really) will always remain in the back of my mind.

The book actually covers the 1690 instrument and its copy made by Tony Chinnery and Kerstin Schwarz. In the unlikely event I do end up building a 1693 copy, this book will go a long way toward helping me make that a reality. In the meantime, I have plenty to do finishing this instrument and looking forward to Owen's guidance on the little Italian.
Until next time...
No comments:
Post a Comment