Monday, August 11, 2014

Day 31: Cutting More Sharps

It turned out that I couldn't really cut all of the sharps on the table saw after all because the gap on the insert is too wide and the finished keys would fall against the blade or into the machine. It was just too big a pain in the rear-end, especially when I have other saws in the shop that are perfectly capable of making a 10-degree cut.

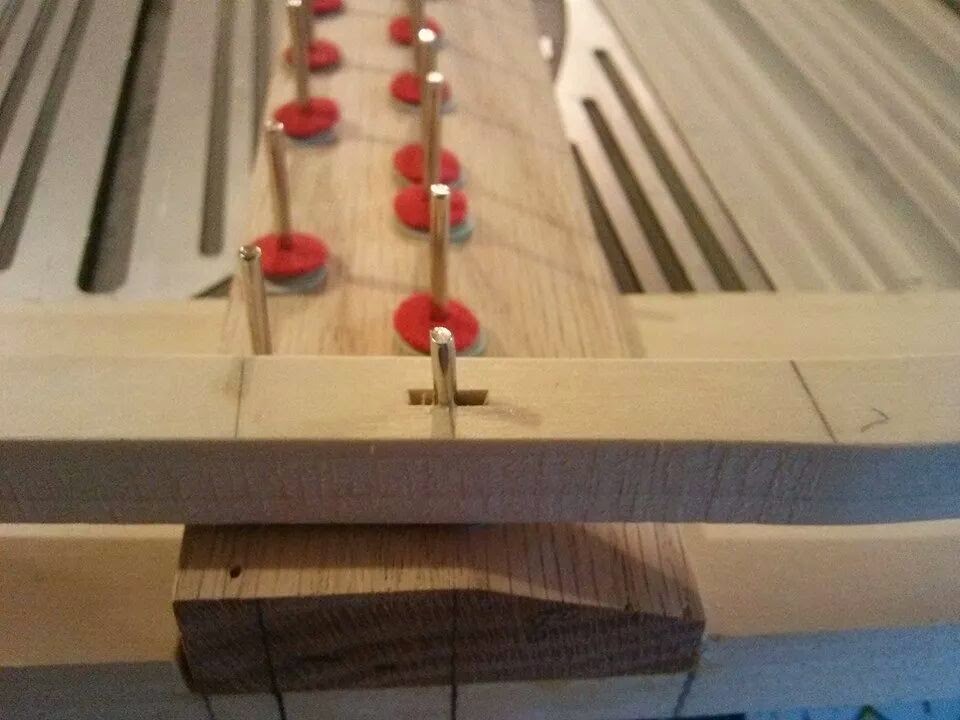
In this case, I switched to the band saw where I set the table at 10 degrees and cut with abandon. As you can see in the photo below, the insert gap is small enough that it did not cause me any problems at all.


You might have noticed an additional piece of wood clamped to the band saw fence. This is to keep the angled part of the key from sliding under the tiny, little gap between the fence and the table and reducing the width of the angle cut. I did something similar on the band saw, but it was not enough to save the keys from pretty significant harm after each cut.

You might also have noticed that I'm not using a piece of scrap to guard against tear-out here. It's been my experience that such a piece is just not necessary with a band saw. Yes, the cuts are a little rougher, but they're nothing some sanding (my favorite task) won't clean right up. I completed 14 of the little buggers tonight.


Because of the clean cut issue with the table saw, I'm going to keep the key I cut yesterday on my desk at work to remind me of what I really love doing (hint: it's not working the day job), replacing it with another I cut tomorrow.

I did trim the boards down with the planer to 7/16" from 1/2". I'm not including a photo of the planing process because, frankly, I forgot to take a picture. The next step is to complete all of the sharps, sand each and every one and begin the somewhat tedious process of gluing them to the longer pieces of the sharp keys.

On a final note, I have not yet cut the slots into the guide rail ends of the keys or sanded/filed the balance rail holes that I punched on last week. I will complete these tasks before gluing the sharps, and it will take quite a bit of time because I'll be measuring my progress in 1/1000th of an inch.

Until then...

Day 30: Cutting the Sharps

I began the process of cutting the sharps last night. The first step was to find enough poplar from which I would eventually cut the 21 keys. I settled on two pieces that, combined, would allow me to produce the 21 plus quite a few extras. The second step was to install the glue line rip blade on the table saw, set it to 10 degrees and rip both pieces of poplar down one side. This cut represents the front of each key.

I set the blade back to 90 degrees and cut both pieces to 2 3/4" in width. I then set the blade back to 10 degrees and took a precise measurement of one of the C# keys using my digital caliper. It turns out the width of each key is just a hair over 1/2". At this point, I cross-cut one of the boards and discarded that first piece because one side was at 90 degrees with the other at 10 degrees.

I then flipped the board over and cut the first sharp key. As you can see in the photo below, I used a piece of scrap wood behind the board to prevent "tear out," something that is easily prevented with such a scrap piece. This often happens when you cut or drill a piece of wood without another piece behind it.


I will cut all of the keys to 1/2" in width, which means a few of them will overhang some of the keys on each side. Mr. Miller assures me this will not be noticeable in the final instrument. The photo below is the first key I cut from one of the prepared boards.


One down, 20 to go.

Until next time...

Friday, August 8, 2014

Day 29: I Stand Redeemed

Okay, so the glue-up of the broken key apparently worked.


As we all learned in high school shop class, the hardened glue will actually be stronger than the wood surrounding it, so I believe I have effected a fix. Or redemption. Or just a fix, we'll see.

More importantly, I discovered shortly after hammering all of the balance rail pin hole slots that there was a conspicuously large gap between a couple of the balance rail pins (keys 35-38 to be exact). I had noticed this in previous photos and was anxiously waiting for someone to call me on it, but no one ever did.

It turns out I missed drilling the balance rail pin holes for keys 36 and 37. This is a huge drag because I drilled all of the holes when the keyboard was a single piece of jointed wood. This means all of the holes were perfectly aligned, I just needed to cut the keys apart.

Needless to say, it was a major pain in the rear-end to get keys 35 through 38 aligned precisely enough that I could be confident drilling the holes in this post hoc manner was going to yield good results. There was a lot of swearing and painter's tape involved, but I finally got things aligned and drilled. Not fun at all.

The good news is that all of the slots are completed and I can move on to filing and sanding the holes to clear them of any errant detritus left from the slotting process. After that, I will begin the process of cutting the sharps from poplar and getting them glued on.

Until then...

Wednesday, August 6, 2014

Day 28: Redemption?

I completed hammering the slots on all of the keys tonight. When I finished, I grabbed the broken key to try to figure out how I was going to measure it to cut a twin when I noticed the break was so clean that I might be able to clear away some of the detritus and glue it back up.


I won't tell if you don't.

I guess we'll see tomorrow whether it worked or not.

Until then...

Day 27: Oops

Well, it happened just like Mom said it would: Everyone's having fun until somebody pokes an eye out. I was working diligently last night to get the mortises punched into the 51 keyframe balance rail pin holes on each of the keys and it was going swimmingly...


Until...


Oops.

I'm honestly not sure what happened, it happened so quickly. One hit...two hits...oh, crap. From the looks of it, the punch simply aligned with the wood grain in an unfortunate way and the rest was, as they say, history. You can even see in the photo above where the punch twisted into the grain a bit.

Fortunately, this was one of the sharps - a piece without the quarter sawn oak arcade on the front - so, I can replicate it completely. Or so I believe. More to come on this in the days ahead.

Until then...

Tuesday, August 5, 2014

Project Update: Planes, Pencils, Set Screws, and Files

I received a message from the distant past last week when a friend from high school who had been watching my Facebook project page contacted me to see if I would be interested in some high quality hand tools left when her father passed away a couple of years ago. I'd heard stories about other guys running across a treasure trove of tools, so I was really quite excited by the prospect of discovering one myself.

When I arrived at her mother's home, it was clear that her father was a talented and industrious woodworker. He had produced from his small basement shop shelves, chairs, bird feeders and, I'm sure, a list of accomplishments that would humble even the most creative woodworker. It was an honor to be chosen to acquire his tools and I will honor him every time I use one.

The list of tools I picked up includes
  • 2 - Stanley #4 hand planes, one with a patent year of 1910
  • 1 - Stanley 220 hand plane (I already owned the black 220 in the photo below)
  • 1 - Small, but very high quality hand plane
  • 2 - Antique hand planes
  • 1 - Antique scribe tool
  • 2 - Metal rasps
  • 1 - Small hand saw
  • 1 - 1/2" wood chisel
  • 1 - Square palm sander
  • 1 - Leather apron
  • 1 - Antique toolbox
  • 15 - Packages of sandpaper of various grains
  • 1 - Heavy duty straightedge
  • 2 - 90-degree straightedges
  • Assorted files of various shapes and sizes
  • Assorted scrap woods, including white oak, poplar, maple, cherry, walnut, mahogany, pine, cedar, and spruce
  • 1 box of smaller scrap woods of all kinds, including several dowels of different sizes
And they let me get away with all of this for only $60.00.  I will always be grateful to my friend and her mother; they will surely be invited as honored guests for the concert debut of Molnar Opus 1. 


As if this weren't enough, I then picked up 72 mechanical pencils at Costco. According to my calculations, it will be the summer of 2065 before I need another pencil (they have a tendency to disappear, but it takes a while).


Finally, I noticed a few weeks ago that a set screw was missing from the left guide block of my band saw. After ordering one and patiently waiting several weeks for it to arrive, I installed it last night in a jif. All good now.


Though I haven't made much progress on the instrument itself, it's been a great couple of weeks.

Until next time...

Day 26: Gluing Felt, Punching Keys

I finally got the back rail felt glued to the keyframe. This felt is intended to cushion the back end of the key, reducing noise when the instrument is played. I ended up using 3M Super 77 spray adhesive for the task.


In hindsight, I should have taped off the back end of the felt before spraying the adhesive - that stuff gets everywhere. This won't affect the sound or playing of the instrument, it just looks a little tacky (no pun intended).

BTW, this means the keyframe is OFFICIALLY COMPLETED! Woo Hoo!!

I also went ahead and tested the key mortise punch tool I received from Hubbard Harpsichords. Yes, I paid $16 for the "tool" because I don't have a grinder, something that I've needed a couple of times during this project. I see a Craigslist adventure in my near future...


The punch tested out fine on a piece of scrap poplar, so I'm going to go ahead and punch away tonight. I've been busy with life the last couple of weeks and have only found myself in the shop after everyone in my neighborhood has hit the sack, which has prevented me from whacking away at the keys. Best not to piss off the neighbors, if you know what I mean.

Until next time...