Friday, October 24, 2025

I know, I know...I never get anything done. Not even close. What could I be thinking? What have I been doing all this time if not building? These are all very good questions.

Admittedly, I seem to have strayed from the path along the way, certainly with regard to completing the Ruckers 1640 single following dear Ernie Miller's Harpsichord Project (now at v5.2) eBook. Frankly, I let too many friend projects, work stress, and other stuff get in the way. I'm embarrassed and I hope you can all forgive me. Now, on to the good stuff.

I've not been idle all this time. In fact, I've been quite busy designing and spending time in the shop learning, refining, and getting other things done. Along the way, I've come to think in different terms about my relationship to power tools, particularly those run by computer, and how to create workflows that are repeatable, sustainable, and work like you-know-what through a goose.

For instance, I recently completed a lovely portativ organ screen for a Facebook friend (front and back views below).


Yes, this is copying the work of another maker, yet I managed to make it more robust (thicker) while honoring the original design. It's my position that if the maker can't produce a good, solid product that won't end up looking like it's been kicked in the teeth, then why can't I take up the cause?

This one is made from two pieces of joined cherry milled down using only the CNC. In fact, the whole bloody thing was carved with a CNC machine. The key to getting the crisp corners lies in using a 5.2-degree engraving bit - just like the ones we use when doing inlay work, something I've been concentrating on for the last year (see - the time was not spent in vain).

When designing the screen, my friend was kind enough to send me an original. Given what I know about mirroring in software, I modeled just 1/4 of the screen, mirrored it vertically to get 1/2 and then mirrored that for the full meal deal. It is, in a word, perfect in every way - no fret saw trails/tangents and no laser burn marks, just carved perfection.

Sure, most of the experienced makers I know despise my CNC. At the end of the day, all the thing does is cut curved and straight lines from my designs - you know...the ones I bust my butt creating - using a high speed router. That's it. They say nasty things (yeah, even to my face) about it and I hold my tongue, but just once I'd like to recommend they dump all of their electrically powered tools in favor of using only the hand tools of the Old Guys. I'm sure that would go over about as much as the CNC work.

This does not deter me. In fact, it strengthens my resolve to use the CNC in ways that make quick, repeatable work of harpsichord parts and pieces. Lately, I've been digging back into making jack sets (including registers) with it.


These are photos of test tongues I designed with Paul Irvin. I'm going to hit the O'Brien book hard and probably make a couple of modifications, but I'm back on track - right where I need to be.

Until next time...

Wednesday, July 12, 2023

Day 190: Roasting Maple for Fun and Profit

Before diving into a post to honor Jack Peters, I thought I'd take a moment to talk about remaking the keyboard - why and how I intend to do it.

Why do I need to remake the keyboard? Well, as you know, I have followed Ernie Miller's Harpsichord Project eBook pretty religiously - until now. As I explained in my last post, meeting and working under the tutelage of Owen Daly has fundamentally changed how I view the instrument and its construction. At first, all I wanted was to build a single instrument I could keep in my little music studio to play for myself. After meeting Owen, building became something different, something to take far more seriously, especially with regard to first principles.

In the previous post, I explained how Jack Peters observed the registers and keys were a bit wonky. This was not by design. Mr. Miller's eBook is flawless with regard to plans and spacing and building techniques, yet I managed to somehow screw up the register hole spacing to the point where it's quite noticeable and now embarrassing. Since Owen guided me to shift away from completing the Hubbard spinet kit and back to completing this little instrument, I became increasingly unhappy with the quality of my work on the keyboard, hence the decision to make a new one.

When discussing the remake with Owen (who I'm pretty sure has come to question my mental stability), he mentioned that the materials I should use are as follows: basswood for the keyblank, cherry for the sharp bodies with bone of some sort for the tops, and ebony for the natural tops. It turns out I do have some ebony, yet I also have a significant cache of African blackwood I purchased years ago from Gilmer Wood Company, which I prefer to use. I used it on the initial keyboard, which is the best part of that monster. It ain't broke, so I'm sticking with it.

What I'm not necessarily sticking with is making the keyblank out of tulip poplar. I also happen to have several hundred board feet of poplar I picked up in a weird sale downtown Portland. I've never had it twist or warp over time. In fact, it's the wood specified by Mr. Miller for the project keyboard. I once emailed Ernie to ask him why the slices are only 4" when joining the board for the blank and he replied that it was to prevent warping, cupping, or twisting by using small pieces, which made complete sense to me. The keys have been solid over the years, yet I ignore Owen's advice at my own peril. I'll be heading down to Crosscut Hardwoods in Portland to acquire the basswood necessary to start the keyboard soon.

Just a couple of days ago, Owen told me about a technique that sounded familiar: Roasting wood to caramelize its lignin, both externally and internally. Roasting is a technique that has become popular lately for woods of all kinds. Roasted maple electric guitar necks are all the rage right now because it makes the wood a beautiful dark golden brown as it cooks. This technique is also used in "Torrefied tonewoods" for acoustical guitar tops (I acknowledge Owen's aversion to the use of the term "tonewood," yet this is how it's used in the guitar lutherie world) to provide a crisper, brighter tone. Does it work? Frankly, I'm not sure, but companies that supply luthiers offer them on the regular.

Owen suggested I start with maple. Later, he admitted that he misremembered the technique and that I should have used cherry because it results in a darker final product. He says that it also smells better during roasting, which would have made my wife much happier with my cooking efforts two nights ago. Because I cooked some sample cuts at 460F in our kitchen oven, the house ended up smelling like a campfire for a couple of hours, which is not really as great as it sounds. The photos below illustrate the original state of the maple cuts, how I prepared them for roasting, and the final products.


In the first photo are some maple slices I cut at different sizes to see how they would perform under heat. The second simply demonstrates how I covered them with aluminum foil in a roasting pan and the last shows the final products - a rich, deep brown that permeates the wood. Really beautiful stuff.

This intial test, even though it was the "wrong" material, was very encouraging. I can't wait to get some cherry sharps into the little toaster oven I picked up (photo below) so I can roast in the shop or the courtyard between the house and the shop.

I found this thing on the FB Marketplace for $25. It's never been used - they list for $75 - and it goes up to 450F, which should be fine for my purposes. Whether the heat in such a small space is too intense for this operation remains to be seen. I'll be testing again tonight with this new little gadget and I'll share the results in a subsequent post.

In the meantime, I'll share an interesting resource that comes recommended from Stevie Sorlie, an FB acquaintance. It's a company, RM Exports, that offers camel bone harpsichord sharp keytop slips. Yes, camel bone. I did a little research and it seems camel bone is denser than bovine, which is perfect for this application. I not only want the cosmetic benefit of nicely bleached bone, I want it to be durable enough to outlast me, which is not a heavy lift, but still. Sure, I can purchase entire bleached camel bones and process them myself, but who has time for that? The slips will take a little processing, but that's not a big deal. I've ordered 110 and they are, as they say, in the mail.

In my next post on this topic, I'll provide details about the next roasting test using cherry in the new toaster, as well as my adventures in procuring basswood for the jointed keyblank.

Until next time...

UPDATE: Still working with the toaster oven. It may be a silly idea, but I had to try. Getting it to come up to temp and stay there seems to be a particular challenge. This may result in procuring a more robust oven and selling this one on the FB Marketplace. More to come...

Update: My Apprenticeship

Over the course of the last few years, several readers, friends, and family have asked me why I've still not finished this instrument, including Ernie Miller, creator of The Harpsichord Project eBook. This is a legitimate question that I'd like to address briefly now. First of all, I was only ever a player of the instrument when I found Ernie's eBook on the Interwebs. Granted, I had worked wood since I was 12 years old, yet making a harpsichord was not something I had ever pursued in my youth or adulthood. Boy howdy, am I glad I took it up and, over the years, it has turned into more than woodworking for me.

Let me explain: While I deeply appreciate the kickstart Ernie gave me with his wonderful book, I ended up meeting Owen Daly in one of the FB harpsichord groups. When I noticed his shop was located in Salem, Oregon, I immediately requested a visit and Owen was kind enough to accommodate me. That's when things got serious. Owen is a masterful builder of harpsichord-class instruments and boasts a 40+ year history of making instruments that are sublime and eminently playable. It was an honor to make his acquaintance and having him guide me through rethinking making and playing has been one of the best long-term experiences of my life.

As most of you know, I do not have my own long history of making these wonderful instruments. I did not apprentice in a famous shop or even build one from a kit before I started this project. Like most things I do, I jumped in with both feet in a kind of ready-fire-aim approach that has not necessarily served me well over the years, yet that's how I roll. I'm working on it, but I ain't no spring chicken, so no guarantees. At first, I was an organist studying with Dr. Lee Garrett at Lewis and Clark College in the early 80s. Part of my education there afforded me opportunities to become familiar with world-class players and instruments, including a beautiful Flemish double (a Will?) at the school.

But, really, that was it for many years. Granted, I had owned a red-and-black-metal-and-plexi Baldwin debacle in the mid-80s and played harpsichord if and when I could find one. The organ was my primary instrument - and still is - yet this wonderful stringed instrument has worked its way into my heart. As you can imagine, dear reader, it's one heckuva lot easier for a singular guy like myself to make a harpsichord in his own shop than to put together a pipe organ, so here we are.

So...what I'm saying is I consider the last few years to be my apprenticeship. I've met wonderful players and builders over the years, including Owen, Paul Irvin, Jack Peters, and a few masters on FB, all of whom have been kind and generous with their support and assistance. I am fortunate to have them at the end of a telephone call or email just about any time and I have always enjoyed my firehose visits with them. And I'm starting to get it. I see now where my faults with this instrument lie and I am taking measures to remedy at least one of them (see below). Regardless, harpsichord making is now a Thing in my life, one that will never dwindle or disappear. I know I will never be a great builder, but I sure as hell have and will continue to put in the time and effort to become a good one, if that's even possible.

The change I will be making to this instrument is a 100% remake of the keyboard. In Mr. Miller's book, it's the first task completed and I think I know why. When one completes something so beautiful, it is quite motivating. It allows for a slower introduction to the instrument and, as we will see, also allows some flexibility with regard to completely remaking it if the desire should manifest. And manifest it has. Years ago, Jack Peters visited my shop in Vancouver, Washington and asked me why the registers were not evenly spaced. My response: "Because I don't know what I'm doing." Rather than mocking me or insisting I remake them, Jack simply nodded and we moved on to the next topic.

Speaking of Jack, as some of you may know, he has retired from the building game and has completely liquidated his stock of instruments, woods, and carcasses. I became one of the beneficiaries of this liquidation and will be giving the experience a post of its own because there's just too much to say here about Jack, how generous he was to me and others over the years, and the cache I ended up acquiring from him. More on this later.

You, dear reader, may not know this, but I have an incredibly bad back to the point where I'm in pain nearly every waking second, and it affects the quality of my sleep nightly. It has also affected the quantity and speed of my production, yet I've taken measures in the shop to reduce the amount of time I spend standing on cement by purchasing what are really robust foam pads meant for professional kitchen work. I've placed them strategically throughout the shop and they seem to help, yet the pain is always there. I'm mentioning this only to set context for the speed at which the Tortuga works. Know that there are reasons for my lack of production and some of them are less than wonderful.

When circumstances mitigate against speedy production, nearly constant motivation becomes necessary. I motivate myself by posting here, which provides some accountability, and by planning and attempting to improve my workflows in the shop. I also interact with the master builders, as well as people on various FB forums, though I've cut down considerably on that for reasons I shall not describe here. One unexpected motivation came recently from someone who appeared in my life quite unexpectedly.

One day a couple of months ago, my wife, son, and I were enjoying a coffee in the Starbucks in downtown Vancouver (an extremely rare occurrence now that we've relocated to Longview, Washington) when a person approached me and said, "Excuse me, are you Darin Molnar?" My first thought was, "Oh, boy, I'm being served by someone." To my great relief, he started talking about this very blog. It turns out I was speaking with a frequent reader (I do not yet have permission to share his name) of my infrequent posts. And get this - he's from Minnesota and was here visiting his parents! It was a most fortuitous meeting that has resulted in fruitful suggestions from him for building out the shop that I have taken to heart. And I'm now motivated to redouble my efforts here, so watch for more posts over the next few days and weeks.

Be assured, dear reader, I will be posting more frequently as a means of catching you up. The Jack Peters cache, the new keyboard, progress on the new shop - all will be covered at length over the ensuing weeks.

Until next time...

Thursday, June 8, 2023

Update: Back to Work

Our beloved and esteemed building mentor, Owen Daily, has insisted that work be resumed on the 1640 Ruckers single, so...we set aside the Hubbard spinet and resume work where directed. I trust Owen more than anyone else in the world when it comes to building, so there you go.

More to come as work progresses...

Wednesday, October 12, 2022

Update: Still Stalled, Yet Working

Greetings, dear readers. I just wanted to post a note about our progress. We've acquired a Hubbard English Spinet kit based on a 1765 Baker Harris instrument. It's a well-known kit with many fine examples playing beautiful music in the wild.

I will not report on the spinet kit build here. Please know that we are working to get that instrument completed, including making a new pine bottom (rather than the plywood that comes with the kit), as well as new registers and jacks. The work is progressing nicely.

We have also moved Tortuga Early Instruments Worldwide Headquarters to a new location in lovely Longview, Washington. This move scaled the workspace up from 150 sq. ft. to 1,650 sq. ft. Ironically, it's almost too much space, but we're weathering that storm nicely and will be back in full production mode by the end of October, 2022.

Once the spinet kit is completed, we will return to this project and continue the updates.

Until next time...

Wednesday, November 25, 2020

Day 189: The Jack Tongue Production Line

As we continue to move through the jack making process, you will notice, dear reader, how the jigs and methods have changed over time. Like everything else related to this project, it's taking me far too long to settle on final methods. For everything. Owen Daly said it best: "You really should have started with a kit." The ironic thing is that I did finally manage to acquire a Zuckerman kit (not a Z-box) five years into this build, but timing has never really been my thing, so here we are.

Rather than expound upon the design of jacks and their tongues, I'd rather just point you toward Grant O'Brien's excellent website and graphic that clearly illustrate the parts and pieces of Ruckers-style jacks. At Owen's suggestion, I adhered pretty slavishly to the dimensions detailed in O'Brien's graphic and was privileged to recently engage in a two-hour 1:1 master class with master builder Paul Irvin in his Portland workshop. Now, on to making some tongues.

As you can see from O'Brien's graphic, the tongues are a pivotal part of the jack (see how I did that?); they rest inside the tongue slots I cut with the 5mm table saw blade on dress pins that act as axles. On the way up to pluck the string, the plectrum pushes the tongue against the angled bottom of the slot, securing it for the pluck. On the way down, the plectrum slides around the string before the damper comes to rest on the string; otherwise, none of the strings plucked would stop sounding and, holy cow, what a cacophony that would be.

One thing I learned from Paul is that the jack bodies are not only planed at an angle from the top down on the sides, they are also planed on the front of the jack. This allows sufficient room for the plectrum to push the jack body away from the string when moving down and then resting securely back in place when the key returns to its original position. As you can see, I left these planing exercises out of the previous post, yet be assured - I will make them so before fixing the tongues into the bodies.

The first step in making tongues is to plane down some European steamed beech to 2mm in height. The quickest and easiest way for me to do this at this time is to use the CNC machine, wasting 10mm of material during every planing session.

This is not my preferred method due to the excessive amount of waste and I don't want to mess with running such thin material through the planer. My ultimate plan is to resaw the beech myself down to 1/4" and then use the CNC for the final flattening. This would save loads of material and, therefore, dollars, and the Tortuga is a frugal fellow indeed. But I digress.

The results are nice, yet it still rankles that so much material ended up in the dust bin.

I then cut the material on two sides against the grain at a 45-degree angle using a tiny Freud table saw blade that is diminutive in both diameter and width. Sadly, I seem to have not captured any photos of this precise, exacting work (it's neither terribly precise nor exacting). After cutting this angle at 45 degrees (it should also be noted that I raised the 5mm blade to cut the tongue slots into the jack bodies to result in a complementary 45-degree angle), which is not traditional. I then made another straight cut to produce the final blanks a little rich in both width and length.

But first, a short digression (rationalization?) about using a 45-degree angle for the cuts mentioned above. The desired outcome when cutting the tongue slots and tongues is to have them fit together in a way that produces a tongue that lies flat against the front and back of the jack. Because I didn't want to mess with setting up 30 degrees here, 60 degrees there, I made them both 45 - both quick blade settings. The result is the same - tongues that lie flat against the jack faces. I doubt anyone will measure the angle and call me on it, but, of course, now they will.

The safest way to cut small pieces like jack tongues it to use a crosscut sled. Fortunately, I had purchased an Incra sled a few years ago knowing I would one day use it for such cuts. The Incra miter gauge fits snugly into it (it can be used with or without the sled) and provides a stop/hold down when cutting super-thin and/or small material.

As you can see from the photo above, I often use "frog" tape as width markers when making such cuts. I also used a piece of scrap beech as a cover to prevent tearout when cutting the tongues. If such material is not used, the saw blade makes a terrible mess of the top of the cut. Another benefit is that an errant tongue doesn't shoot from the saw and stick into one's face or other sensitive bodypart. Safety first at Tortuga Early Instruments Worldwide Headquarters.

A well-known conundrum of tongue making is how to cleanly cut the v-grooves into them. Owen had suggested I use a thin saw to mark a center line and trim out the sides with a small chisel. Paul recommended I use a "veining tool" used by leatherworkers. Before combining their suggestions, I had devised my own hair-brained scheme that involved a gent's saw (a small back saw) and a triangular file. Unfortunately, it cost millions of dollars and thousands of lives before I realized it was a pretty crappy approach.


While the results were okay, they did not provide the clean, crisp cut I had observed in jacks made by Norm Purdy. It was also a helluva lotta work. This is where the combination of Owen's and Paul's recommendations became a reality. The first thing I did was to make a small guide cut into the tongue using the gent's saw. Then, I used the veining tool in the photo below. Since this was my first experience using the tool, it took a dozen or so to settle on the proper angle and I ended up completing each groove with just two clean swipes. So, the prep station and veining tool ended up looking something like this:


Once I got the grooves dialed in, it was time to turn our attention to drilling the tongue axle holes and dimensioning the tongues. I intentionally left the tongues a little rich so they would fit tightly into the tongue slots. Then, we fitted the drill press with another .6mm bit and drilled the holes. You can see my little block plane in the bench vise above - it's upside down so we can trim the tongues for their final fitting.

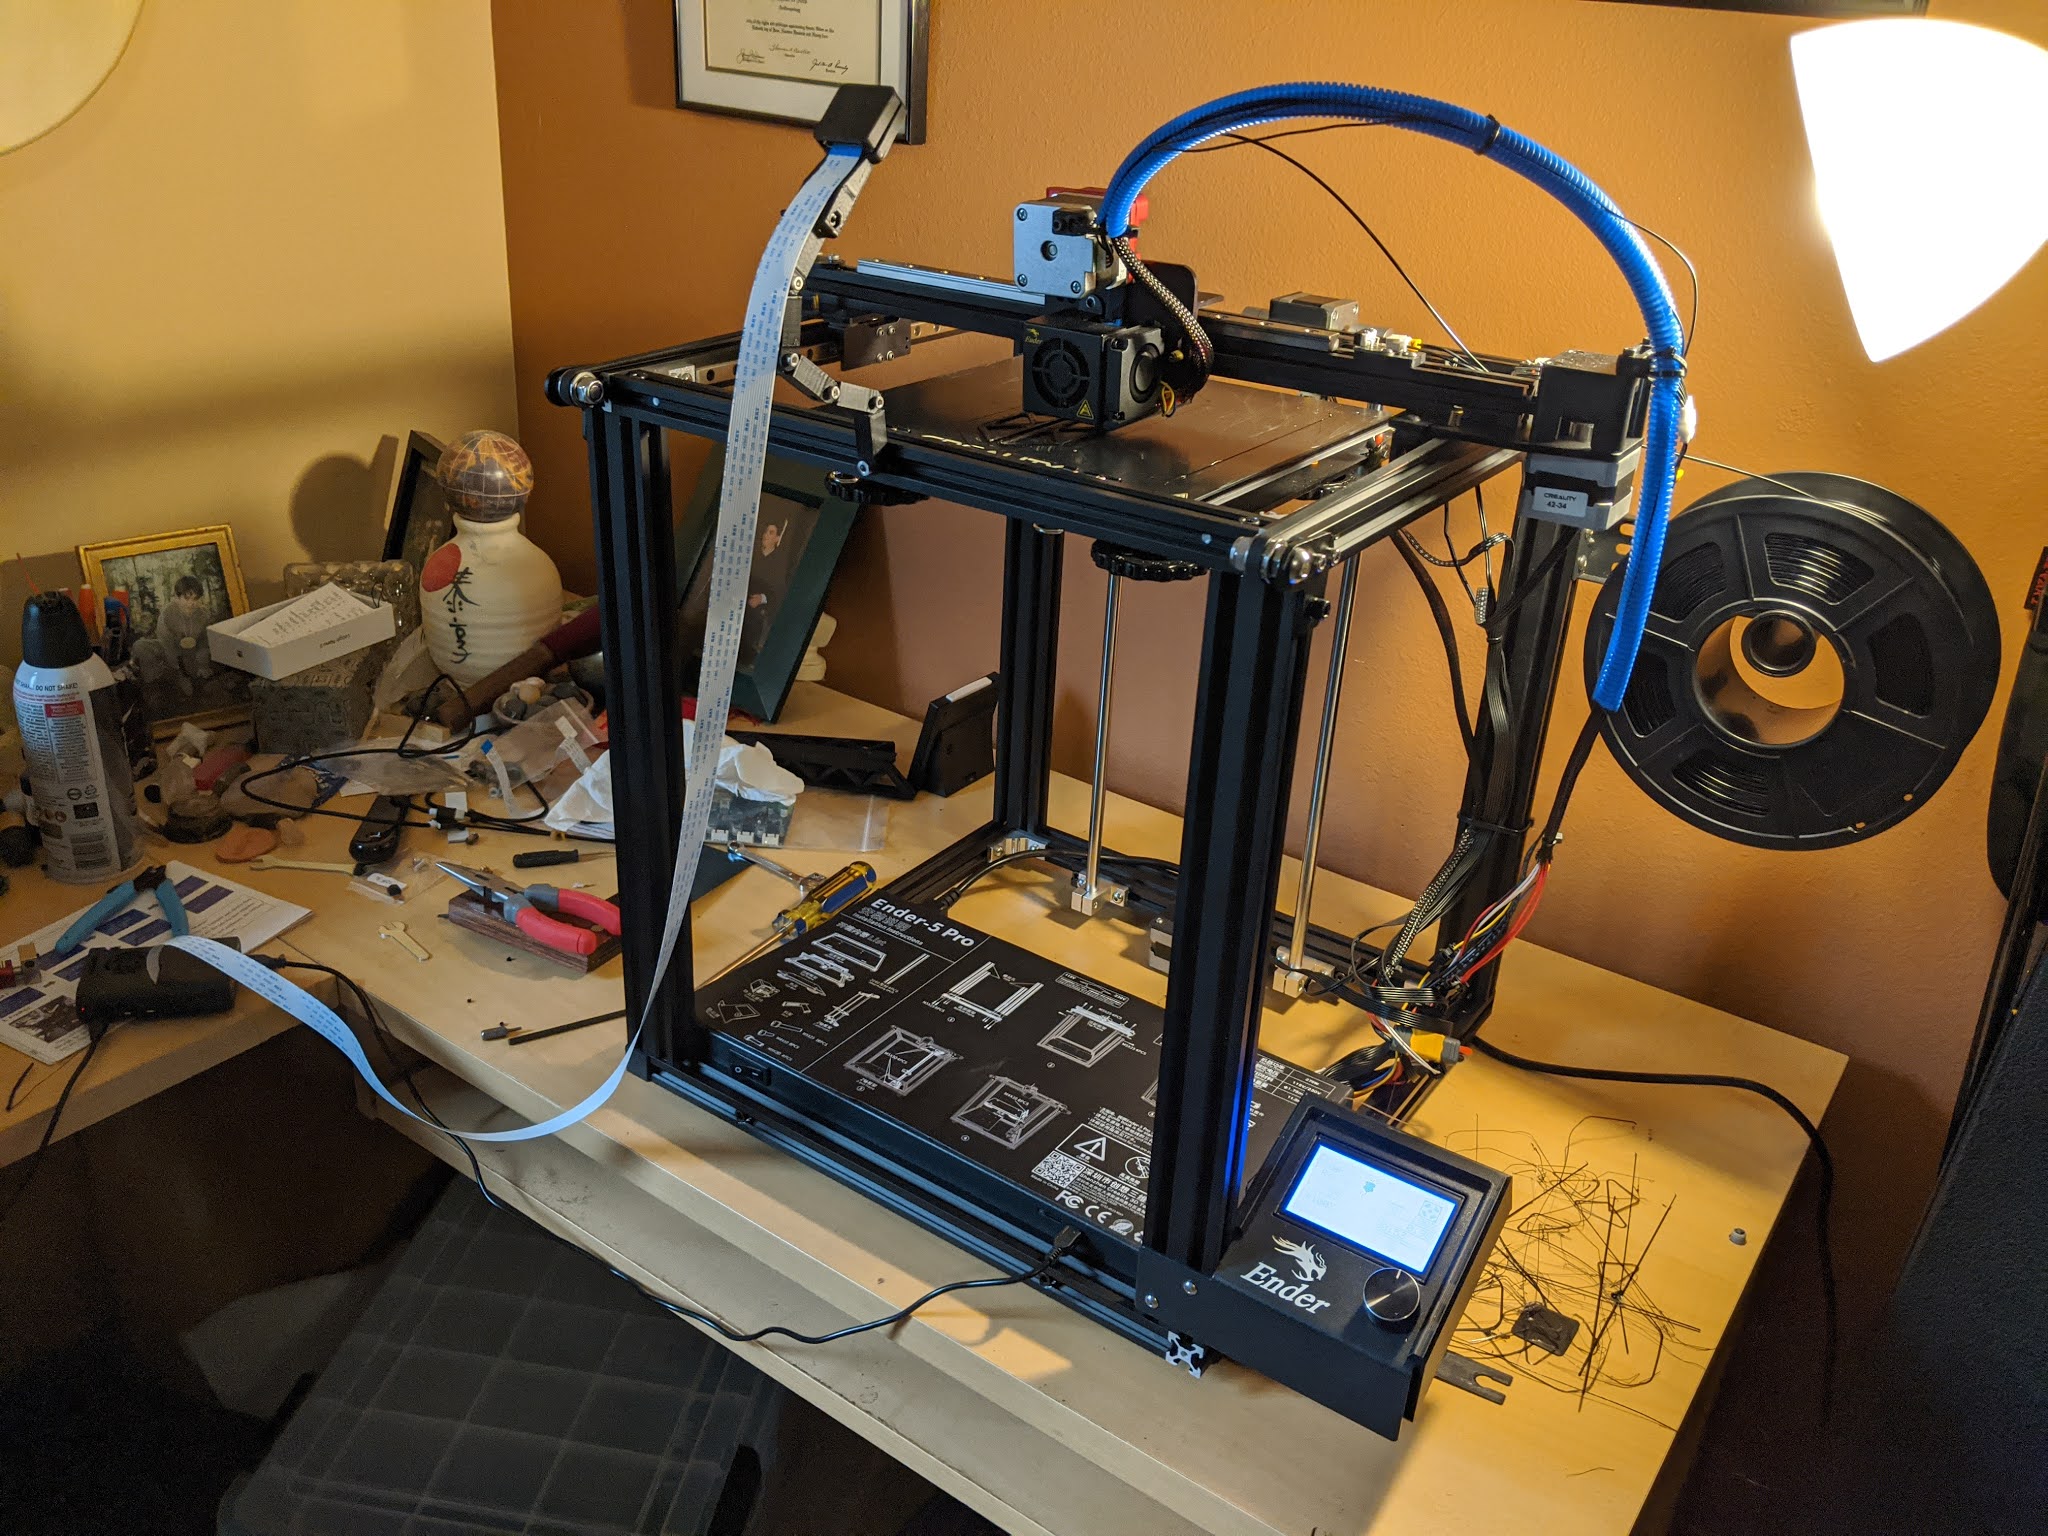
It's widely known by now that we've brought a 3D printer into Tortuga Early Instruments Worldwide Headquarters.

So...why not use it to create jigs for the project, right? In this case, I designed and made a jig that holds the tongues at a precise angle and position so we can punch them using the drill press. I ground down a micro screwdriver to act as the punch and, as Owen says, "Bob's your uncle!"


The nice thing about a 3D printer is it's easy to redesign and remake something if it doesn't work 100% on first use. I've already made changes to the jig to provide little fingers to secure the tongue when removing the punch, which is astonishingly difficult, by the way. At any rate, you can see the Secret Weapon (Conner McClure) hard at work punching tongues while I'm off doing some other menial task.

In the end, we were able to successfully make a jack that, by all indications, might actually work.

After the 1:1 with Paul Irvin, I still have some modifications to make to both the planing of the jack bodies, as well as the jig. In the case of the jig, I will end up with two - one for the 8' and one for the 4' ranks - because the plectrum punch holes will be in different locations on the tongue. More about this later.

This wraps up the 6-month catch-up session. I will not leave you hanging like this again - I promise (to the best of my abilities). Now, it's time to sit back, relax, and enjoy the holidays with some of the finer things in life (yeah, that's a Tortuga Early Instruments label on the bottle). And make some jacks.

Until next time...

Monday, November 23, 2020

Day 188: The Jack Production Line

It's been quite a while since I've updated you, dear reader, on my jack production progress. In fact, it's been around six months - far too long for us to have been apart. Of course, an intervening pandemic hasn't helped matters much, but it also hasn't slowed down the jack making progress, just the blog posts. Also, please note that I've changed just about every jig and process from previous posts, so the next few updates are entirely warranted.

Before launching into several posts about making Flemish style jacks for harpsichord copies, particularly those of the Ruckers family, let's revisit the need for me to make my own jacks. Frankly, it comes down to me listening to Owen Daly when he says I should at least learn to make jacks in the interest of understanding the details of not only the making process, but the jacks themselves. As with everything harpsichord, Owen is right.

The wonderful Harpsichord Project 4.1 eBook by Ernest Miller that launched me down this path specifies jacks to be purchased from Hubbard Harpsichords. I've taken so long to complete the instrument that Hubbard Harpsichords have shut their doors. But there are other options. Two notable names in the jack making world are Purdy and Austin, both of which I'm sure could supply me the sets I need to complete the instrument, yet I soldier on with the support of Owen and Paul Irvin, another master builder who lives just 10 miles south of me.

It's been a long and winding road getting to the point where I can produce jacks reliably and without too much angst. While they are small and somewhat unassuming, jacks hold many subtleties hidden from the casual observer, all of which I will cover in this and subsequent posts. So, I'm back now to share the information and education I've gleaned over the last six months, much of it born of mistakes, most of it learned from the masters.

Let's begin with the jack bodies. The jack body rests on the end of the key farthest from the player and rises as the key is fulcrumed up during play. Jacks contain a slot into which fits a "tongue" that holds the "plectrum" which plucks the string, rendering the unique harpsichord sound we've all come to know and love. First, we begin by carefully slicing the jack body blanks from Eurpoean steamed beech stock; the dimensions are 12.7mm (1.2") x 5mm (just over 3/16") x 152.4mm (6"). We only need 104, but we cut 120 just in case.

Next, we clean up the jack body blanks using a Lie-Nielsen 62 low-angle jack plane with a jig I designed and made on the CNC machine. I've been adamantly advised against using the CNC machine for any kind of instrument manufacturing, yet this is a clear case where it benefits both me and the instrument.


As you can see, the jig holds the plane and jack body nice and snug for good precision. I made it from poplar, a fairly soft wood, to protect the plane blade from overwork. When it wears down, as it most certainly will, I will simply cut another from the hundreds of board feet of poplar I have standing in the shop.

Then, 5mm tongue slots are cut into the jack bodies on the table saw using a shop-made jig and custom blade with 5mm wide, flat carbide teeth.

The jack blank that lies perpendicular to the jack body under the jig in the photo above is used to keep the jack body flat and stable as it is pushed through the blade. Eventually, we end up with a box o' jack bodies with tongue slots.

The next step is to drill the holes for the PEEK filament spring. This spring is light and keeps the tongue in place, even as it slides around the string on retraction (i.e., fulcruming down after the pluck). For this operation, I designed and built a jig that uses an adjustable vise that clamps down a jack body holder. On the other side, I purchased two 3D printer linear rails/bearings on which I mounted a Dremel tool with an extender to hole a .6mm drill bit typically used to drill printed circuit board holes.


The drill bit enters the jack body at a 15-degree angle, resulting in a divot on the back side (really the eventual front side of the jack) that acts as a channel for the PEEK filament. We then clean them further using a jeweler's file. In the photo below, my secret jack-making weapon, Conner McClure, is doing this work.

Next, we will examine the manufacturing process for tongues, something that sounds a lot more fun than it actually is. Because the tongues are a somewhat laborious and intricate process, I'll save their details for the next few posts and hope to see you there.

Until next time...

Sunday, May 24, 2020

Day 187: A Finished Jack and Actually Listening to Owen

Well, folks, I did it - I actually completed a jack from stem to stern. Cutting, sawing, drilling, assembling...all of it.


I ended up using a .7mm drill bit intended for drilling holes into printed circuit boards with a "pin vise" mounted in the drill press.


While this did bring me to the doorstep of success, I must admit that I'm not 100% onboard with the approach. I had picked up the idea of using a pin vise from Bill Jurgenson's fine website. Naturally, he's probably using a top-of-the-line jeweler's pin vise while I simply ordered mine from eBay hoping it would work. It did not, at least to my complete satisfaction, and here's why.

The drill bit barely fits into the end of the pin vise, so the connection is somewhat tenuous at best. It is also nearly impossible to get a perfectly straight seating of the bit into the vise, which produces a wobble no matter how carefully I try to insert the bit. At these tolerances, even a .1mm wobble results in adding that much to the hole, making it larger than intended. As much as I want it to be, this is not acceptable.

I also learned a few things about the angle of repose of the vise holding the jack body. In this case, I had set it at 10 degrees, which produced a hole that exited the back too soon (i.e., the angle is too acute). What I need is a smoother slope that allows the bit to exit farther down the opposite side of the body - something more along the lines of 7 degrees. This is required because an angle that's too sharp forces me to cut the through hole (for the PEEK filament spring) too high on the body - in some cases into the tongue divet. Also not acceptable.

In the end, I'm forced back to the drawing board and to actually take Owen Daly's advice regarding this matter - advice he gave me over a year ago. I have no idea why I don't just listen to him and do what he says. Call it a character flaw, I don't know. I can only imagine how exasperated he is with me by this time. I've been pulling this sort of thing for years and always end up just doing what he told me to do in the first place and finding success. Maybe someday I'll learn.

By taking Owen's advice, I mean that I'm now designing and building a slider with a horizontal orientation. It requires a surface mounted to roller bearings that traverse two metal rods to provide the to-and-fro motion of an equally mounted Dremel tool. Said Dremel holds the .7mm drill bit perfectly straight, providing a more stable and accurate cut. I'll be posting more about this device because I ordered the parts tonight and they won't arrive for another week (or two under present extenuating circumstances).

This whole process has been exhausting, but I must keep at it until I can produce jacks reliably and in great number. Then, I will celebrate my success and order all of my jacks from Norm Purdy in Eugene.

Until next time...

Tuesday, April 14, 2020

Day 186: Ideas, Viruses, and Jack Tongues

After my brief explanation for my absence, it's time to get back to the jacks. So far, I've managed to cut pretty reliable body blanks and slot them using the custom table saw blade (the one with 5mm wide carbide teeth). I drilled the tongue axle holes into the bodies using a tiny, little (.7mm) drill bit and also cut the tongues on the CNC (sorry, Owen, it's just easier and more accurate that way). All of the tongues were cut from the side, so I was able to not only cut them, but to drill the complementary axle holes using the .7mm bit there, as well. In the future, I'll also flatten the beech material to 5mm on the CNC before cutting the tongues.

Now, jack tongues are like ideas and viruses - astonishingly small while holding enormous influence. In this case, I will put as much time into making a set of jacks and their parts and pieces as I do the case and soundboard of the instrument. I've been working solely on the tongues the last few days, punching the plectrum holes and sawing in the slot for the PEEK spring filament.

First, the punch process. I used a punch on loan from Owen Daly that I inserted into the Jet mortising machine. Owen had ground down from a spade bit the business end of the punch many moons ago - before he worked exclusively with Norm Purdy in Eugene for all of his jacks. It's probable I'll be making my own punch that is, as Owen has suggested, a little thicker on the initial punch and sloping up. I also made a jig to hold the tongues. In the end, I was able to punch through, but was not entirely happy with the results.


The bottom photo above is the reverse side of the tongue. As you can see, it's got a little pucker that's not appropriate in this circumstance (to be sure, circumstances do enter the imagination in which a pucker is entirely appropriate, this just ain't one of them). After much careful thought over some Tullamore Dew and a large, square ice cube, I realized I could simply hit the reverse side with some high-grade sandpaper to remove said pucker and use the punch to clear the hole from that side.


The result, as you can see, was A-OK. What is not apparent is how the jig slot into which the tongue slides is sloped at 10 degrees to create a 10-degree hole that slopes down from front to back. This supplies a slight upward tilt to the plectrum (when we get to that point) once installed.

The next challenge was figuring out how to get a slot cut vertically into the back of the tongue that would hold the PEEK filament that acts as a tongue spring. Owen was kind enough to give me some example jacks and the spring slots are things of beauty. Owen told me how guys like Norm have jigs that hold a Dremel tool with a v-bit into which they slide the tongue and...voila!...the most gorgeous slot you've ever seen.

I've also seen makers who simply cut a slot with a small table or band saw. I decided to give this approach a shot and, while I appreciate the expediency of power tools, I also don't like working with amazingly small parts while a blade is running at 1720 rpm. So, I grabbed my good, old gent's saw, nestled a tongue lovingly in my upgraded vise jaws and went to work.


In cutting these slots, the tongues, the punch holes, and everything else about these gadgets, I've come to agree with Malcolm Gladwell that it takes about 10,000 repetitions to achieve mastery. While I clearly didn't take that many hours or pieces to start creating acceptable tongues, I did end up with quite a few on the shop floor. The good news is I can cut hundreds upon hundreds of these in a day using the CNC, so no harm, no foul.

The last step is to cut a couple of holes into the jack body tongue slot that will hold the PEEK spring to keep the tongue in place. This will require one more jig that I'll make adjustable (still have that Zuckerman Flemish XIV needing three sets) to accommodate other jacks in the future. I will bolt it to the drill press table and it will provide a 10 degree tilt for the .7mm bit to do its dirty work. More on this story as it develops.

Until next time...

Sunday, March 22, 2020

Project Update: Where has the Tortuga been?

As you know, it's been far too long since I've posted here. I've been, in a word, sidetracked with another project and have kept my commitment to neither the instrument nor you, my dear reader. Please accept my apology. Now...an explanation.

Two events occurred over the past year that have mitigated my progress on the instrument. The first involves the jacks. I had been deliberating about whether to make them or purchase them from Norm Purdy, a world-class jack maker who lives about three hours south of me in Eugene, Oregon. First, I attempted to make them. When I realized it took a lot more focus than I had been giving it, I decided to simply purchase them from Norm at $5 per jack, which would cost me something on the order of $625. I consider this a great investment, even though the client paying for the instrument is me.

Then, I had an extended conversation with master builder, Owen Daly, who convinced me it would be in my long term best interest to make a set so I would, in Owen's words, "know what to look for when purchasing them in the future." So, it was back to making jacks, which involved using a tongue punching jig Owen had loaned me, figuring out how to line things up, making miniscule cuts with chisels, etc. It was overwhelming and, frankly, still is. But I continue to learn something new every day while I finish that elusive first set.

The second event was a business decision centered on making a high quality MIDI keyboard that provides a pluck/tracker touch that can be, for lack of a better term, turned on and off by moving the keyboard. This keyboard can control any music software that accepts MIDI ON/OFF signals. I had written the MIDI encoder software, designed the printed circuit boards, completed multiple three-dimensional CAD drawings over the course of the last year, and started making the first prototype when I hit a crossroads.

Like you, dear reader, I have experienced several watershed moments in my life. Moments in which a binary set of options were presented and I, in my infinite wisdom, chose the wrong one. I have many examples I will not bore you with here. As I was in the shop trying to figure out where to store wood and parts and pieces and keyboards, I realized my heart was just not in the MIDI work as much as I thought it would be. Sure, it's fun discovering new ways to do things and to create a dedicated microcontroller and to work with PCB design software, but, ultimately, it's not what I want to do. Maybe someday, but not right now.

So, the MIDI work goes on the shelf indefinitely and I'm back to making harpsichords full time. Of course, by "full time," I mean when I'm not completely exhausted from the day job and distracted by honey-dos and the exigencies of everyday life (this crazy virus-that-shall-not-be-named thing notwithstanding). It's harpsichords or bust at Tortuga Early Instruments Worldwide Headquarters moving forward. Watch for more posts here as I reengage in what I truly love and what started me down this path in the first place.

Another event that is heavily influencing how I approach work in the shop is the recent acquisition of a 1985 Zuckerman XIV single manual harpsichord kit. Holy cow, I didn't see this one coming. I received an email from Owen a couple of weeks ago that read something along the lines of "Hey, I know a guy who's been talking with a guy who has a Zuckerman kit I think you might want to take a look at." He was right. I ended up purchasing the kit from a nice gentleman who was managing liquidation of his stepmother's estate and it now sits in the shop taking up more room than the Ruckers because it came with all parts, including the stand (yeah, I said that in one breath).

Owen thought it would be a great idea for me to build a kit AFTER I finish the Ruckers. The thing is, the previous owner did not assemble a lot of the instrument, so there is a ton of work left to do on it. Sure, all parts are cut, yet it's in pretty rough shape from sitting on a living room floor for 35 years with several parts stored on the top, which has bowed a bit. I may not be able to salvage the keyboard and I will need to make new upper and lower registers, as well as three sets of jacks - it's an 8'/8'/4'! I'm fine with this because soon I will be a jackmeister. But first...where to put it?

IKEA sells harpsichord kits?!?

Roubo supports Zuckerman

When I picked up the kit, I was feeling a little under the weather and have not felt entirely well for the better part of the last three weeks. No, it's not the virus-that-shall-not-be-named, but I still feel a little squiggy even today. At this point, I'm simply taking stock of what I brought home. I must say, as a former archaeologist, I do feel a combined sense of trepidation/hesitancy/sadness/horror that I will be putting the thing together. I feel as if I've entered the back rooms of a museum and found all the artifacts of the kit intact. It has, at least to me, enormous historical significance, so what better way to honor the Zuckerman organization and what it has meant to so many people over the years, right?

When I do begin building it, I will start up another blog to track my progress, which I assume will be significantly faster than what I've demonstrated here. I'm still learning lessons on a nearly daily basis, but I've been pleased to see that I understand more of what Owen talks with me about and that I can now look at a harpsichord more critically (not in the sense I'm criticizing the builder, but, rather, with a more informed eye) and I like how that feels.

In the meantime, it's back to jack production for the Ruckers. I'll be posting on a much more regular basis here, so please come back early and often.

Until next time...

Thursday, August 1, 2019

Day 185: Jacks Yet Again

It's been a long while since I've updated you here. My apologies. Things have been hectic and I've been awaiting a new custom made table saw blade with 5 mm teeth from Snooks Saw Service in Salem, Oregon (recommended by Owen Daly, of course). Well, the monster finally arrived, so I went to work on the jack blanks I had cut a few weeks before.


Rather than run them through barehanded, I grabbed some walnut from the stash and made what I think is a nice, little jig that will keep my hands safe. I used the CNC for maximum accuracy, as well.


I'm quite happy with it, though there is some tearout that happens based on the flatness of the teeth and the lack of support as the blanks meet the blade. Some loss is unavoidable, but nothing I can't live with. As you can see, the tongue slots came off nicely.


Because I had cut the tongues on the CNC, including setting the axle holes there, I could drill the axle holes into the bodies of the jacks using a .7 mm drill bit with great precision. These bits are typically used to drill holes into printed circuit boards and work quite nicely for this purpose.


As you can also see, I made a placement jig for these, too. It works. I was able to drill 99 without breaking a single bit.


I then inserted the pins I will be using into a hole and through a tongue and...it worked!


Now, to make jigs for the PEEK spring holes and to cut spring reliefs into the backs of the tongues. Just today, I located a 9" band saw for $15 on the Facebook Marketplace for this very purpose that I'm picking up tonight. I'm sure you'll see it in action in the near future.

On a couple of tangentially related notes, I came across an amazing sale of tools and wood downtown Portland a couple of months ago. I ended up grabbing about 3 gallons of Natural Danish Oil, a Fein shop vac for the CNC, and a couple of hundred board feet of poplar.


I won't need to purchase poplar for a very long time.

I also recently added a wonderful new book to the library.


The only other two books that have had as much impact on me are Hubbard's Three Centuries and O'Brien's Ruckers book. The analyses and articles are just amazing and I can't wait to apply some of what I've learned to the instrument.

Until next time...